SCEPTRE

Emulation capability for Industrial Control Systems
View the Project on GitHub sandialabs/sceptre-docs
Quick Start Guide
Installation
The SCEPTRE platform is a combination of COTS hardware, software, and Sandia-developed tools. Installation can be local (one computer) or distributed (multiple computers).
For the best performance, install SCEPTRE using the distributed installation guide.
Prerequisites
- Computer has Ubuntu 20.04 LTS or 22.04 LTS installed as the operating system
- Computer has internet access to install packages (or an apt-mirror has been configured). If behind a web interception proxy, ensure
aptis configured to use the proxy. - All commands should be ran as
root. Switch to the root user usingsudo su. - Install ORAS to download pre-build VM images.
Local Installation Guide (Quickest)
For a local SCEPTRE installation, a single computer will act as both headnode and compute node.
- Check Prerequisites and ensure you are running as
rootuser (sudo su). -
Install required packages. Alternatively, follow Docker’s installation instructions for Ubuntu.
apt update apt install -y git docker.io docker-compose-plugin -
Optional If behind a proxy server, configure Docker to use the proxy
mkdir /etc/systemd/system/docker.service.d/ cat <<EOF | sudo tee /etc/systemd/system/docker.service.d/http-proxy.conf [Service] Environment="NO_PROXY=*.example.com" Environment="HTTP_PROXY=http://proxy.example.com:8080/" Environment="HTTPS_PROXY=https://proxy.example.com:8080/" Environment="no_proxy=*.example.com" Environment="http_proxy=http://proxy.example.com:8080/" Environment="https_proxy=https://proxy.example.com:8080/" EOF systemctl daemon-reload systemctl restart docker -
Install topologies and base images
mkdir -p /phenix cd /phenix git clone https://github.com/sandialabs/sceptre-phenix-topologies.git topologies git clone https://github.com/sandialabs/sceptre-phenix-images.git vmdb2 -
Install phēnix source files
mkdir -p /opt cd /opt git clone https://github.com/sandialabs/sceptre-phenix.git phenix -
Optional Download pre-built VM images. Not all images are required.For a basic deployment of SCEPTRE,
bennu.qc2is recommended. NOTE: This requires ORAS to be installed and theorascommand to be available.mkdir -p /phenix/images cd /phenix/images # Download essential images from open-source oras pull ghcr.io/sandialabs/sceptre-phenix-images/bennu.qc2:latest oras pull ghcr.io/sandialabs/sceptre-phenix-images/vyos.qc2:latest # Optional: download other open-source images as-needed # Available images are documented in the sceptre-phenix-images README # https://github.com/sandialabs/sceptre-phenix-images oras pull ghcr.io/sandialabs/sceptre-phenix-images/ntp.qc2:latest oras pull ghcr.io/sandialabs/sceptre-phenix-images/kali.qc2:latest oras pull ghcr.io/sandialabs/sceptre-phenix-images/bookworm.qc2:latest oras pull ghcr.io/sandialabs/sceptre-phenix-images/jammy.qc2:latest oras pull ghcr.io/sandialabs/sceptre-phenix-images/noble.qc2:latest oras pull ghcr.io/sandialabs/sceptre-phenix-images/docker-hello-world.qc2:latest oras pull ghcr.io/sandialabs/sceptre-phenix-images/ubuntu.qc2:latest oras pull ghcr.io/sandialabs/sceptre-phenix-images/ubuntu-soaptools.qc2:latest oras pull ghcr.io/sandialabs/sceptre-phenix-images/minirouter.qc2:latest -
Install docker images
-
Pull pre-built docker containers. Useful for users of SCEPTRE.
docker pull ghcr.io/sandialabs/sceptre-phenix/phenix:main docker pull ghcr.io/sandia-minimega/minimega:master -
Alternatively, build the docker containers from source. Useful for developers of SCEPTRE.
cd /opt/phenix/docker docker compose build -
Tip - If behind a web proxy, you must add
http_proxyandhttps_proxybuild args to the build command (Ex.--build-arg http_proxy=http://proxy.example.com:8080 --build-arg https_proxy=http://proxy.example.com:8080). Additionally, theINSTALL_CERTSbuild args may be required for custom certificates.
-
-
Set the
CONTEXTenvironment variableecho "export CONTEXT=$(hostname)" >> ~/.profile source ~/.profile -
Start up the SCEPTRE docker containers (minimega and phenix)
-
Method 1: standard compose, that also starts Elasticsearch and Kibana, and builds a phenix image
cd /opt/phenix/docker docker compose up -d -
Method 2: only creates phenix and minimega, using the latest images from open-source
  cd /opt/phenix/docker
  docker compose -f no-build_docker-compose.yml up -d
-
-
Optional Add a few convenience aliases to your shell
cat <<EOF >> ~/.bash_aliases alias phenix='docker exec -it phenix phenix' alias mm='docker exec -it minimega minimega -e' alias mminfo='mm .columns name,state,snapshot,cc_active,id,ip vm info' alias mmsum='mm .columns name,state,cc_active,id,uuid vm info' alias ovs-vsctl='docker exec -it minimega ovs-vsctl' EOF source ~/.bash_aliases - Access the phēnix web GUI at
<server-ip>:3000orlocalhost:3000 -
Run phenix command line. NOTE: If you didn’t configure the aliases above, then replace “phenix” with
docker exec -it phenix phenix.phenix --version phenix --help
Distributed Installation Guide (RECOMMENDED)
A distributed SCEPTRE installation requires one headnode computer and one or more compute nodes.
Headnode Install - The headnode is the computer where experiment management tools are installed. Virtual machines do not run on this machine. For hardware requirements, see Headnode Requirements
- Check Prerequisites and ensure you are running as
rootuser (sudo su). - Follow the steps in the Local Installation Guide to deploy SCEPTRE on the headnode.
-
Stop the Docker containers
cd /opt/phenix/docker docker compose stop -
Configure NFS share. Setting up a Network File Share allows sharing of the base KVM images across multiple nodes. Tip - This is much more efficient than copying large base KVM images to each node individually.
echo '/phenix/images *(rw,sync,no_subtree_check)' >> /etc/exports service nfs-kernel-server restart -
Start up the docker containers
cd /opt/phenix/docker docker compose up -d - Access the phēnix web GUI at
<server-ip>:3000orlocalhost:3000
“Compute Node” Install - The compute node is the computer where virtual machines run. For hardware requirements, see Compute Node Requirements
- Check Prerequisites
-
Install required packages
apt update apt install -y nfs-common openvswitch-switch qemu-kvm tmux vim -
Mount NFS share. Replace
X.X.X.Xwith the IP address of the headnode.mkdir -p /phenix/images echo 'X.X.X.X:/phenix/images /phenix/images nfs auto,rw 0 0' >> /etc/fstab mount -a
Getting Started - Helloworld Experiment
-
Download the required backing image
ubuntu.qc2cd /phenix/images oras pull ghcr.io/sandialabs/sceptre-phenix-images/ubuntu.qc2:latest -
Access phenix web
-
The phēnix web interface allows for creating, configuring, and managing SCEPTRE experiments. First open up
http://<Headnode IP address>:3000in your browser, and you’ll see the home page displayed: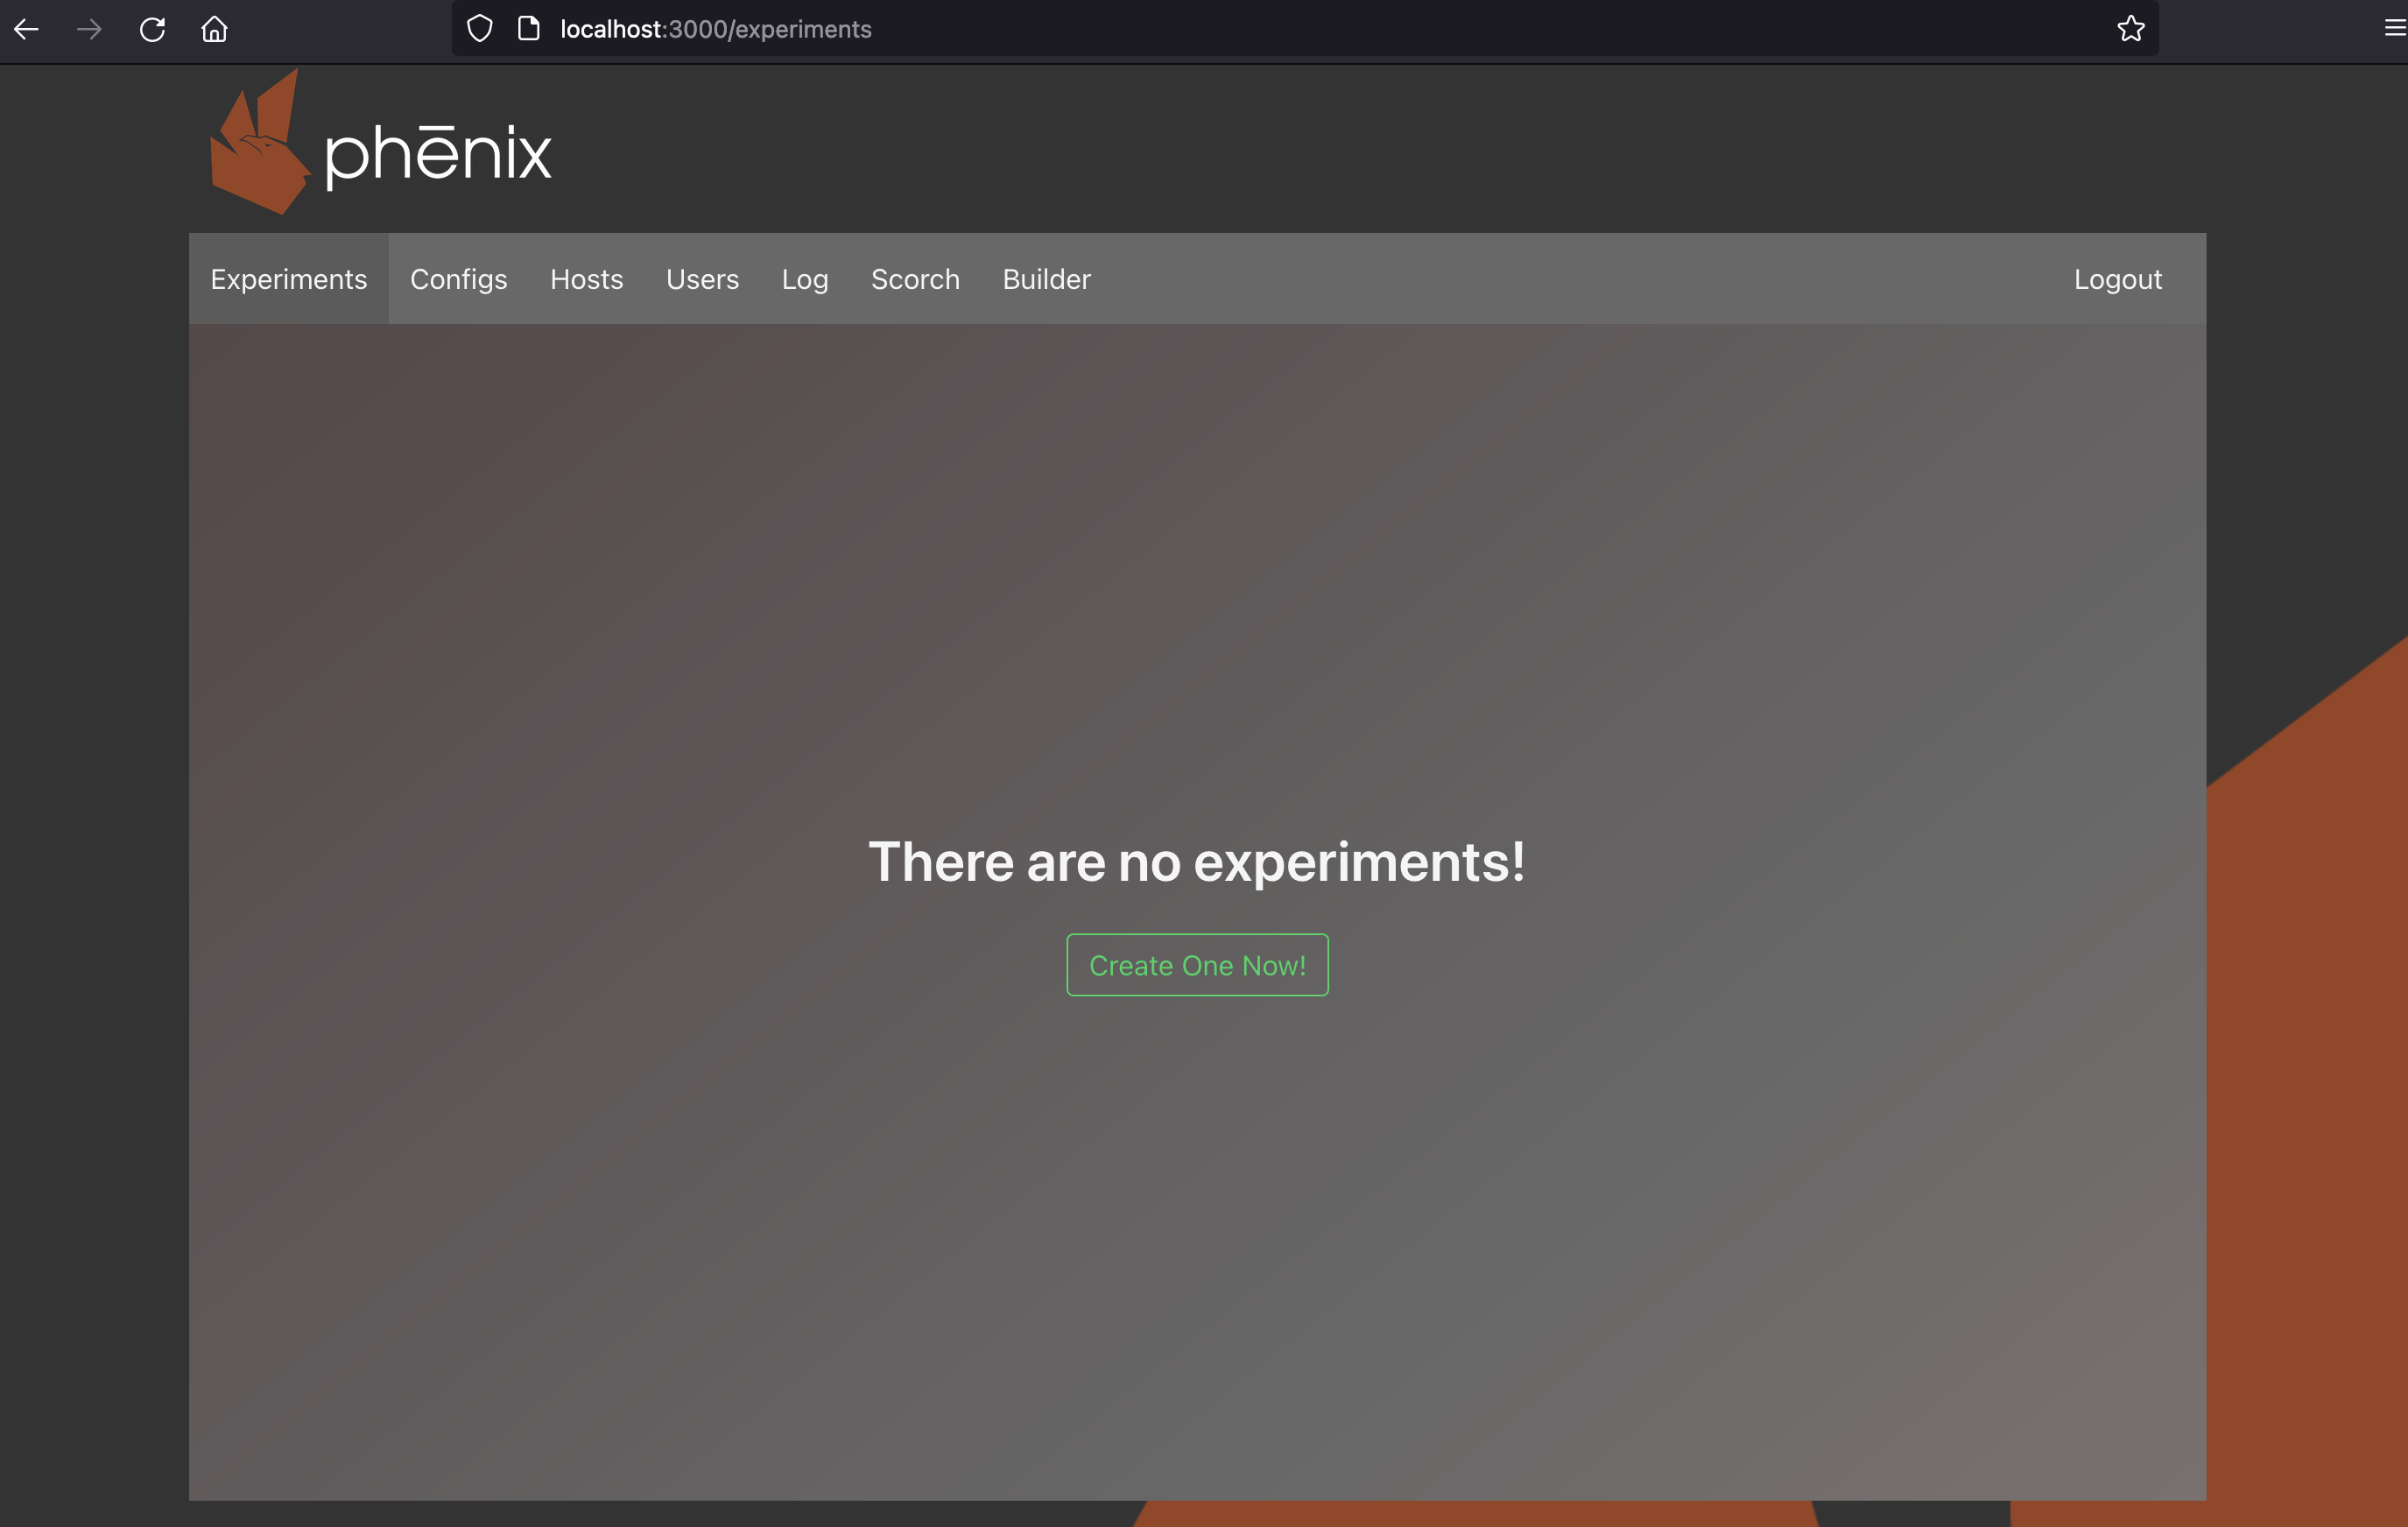
-
-
Upload topology
-
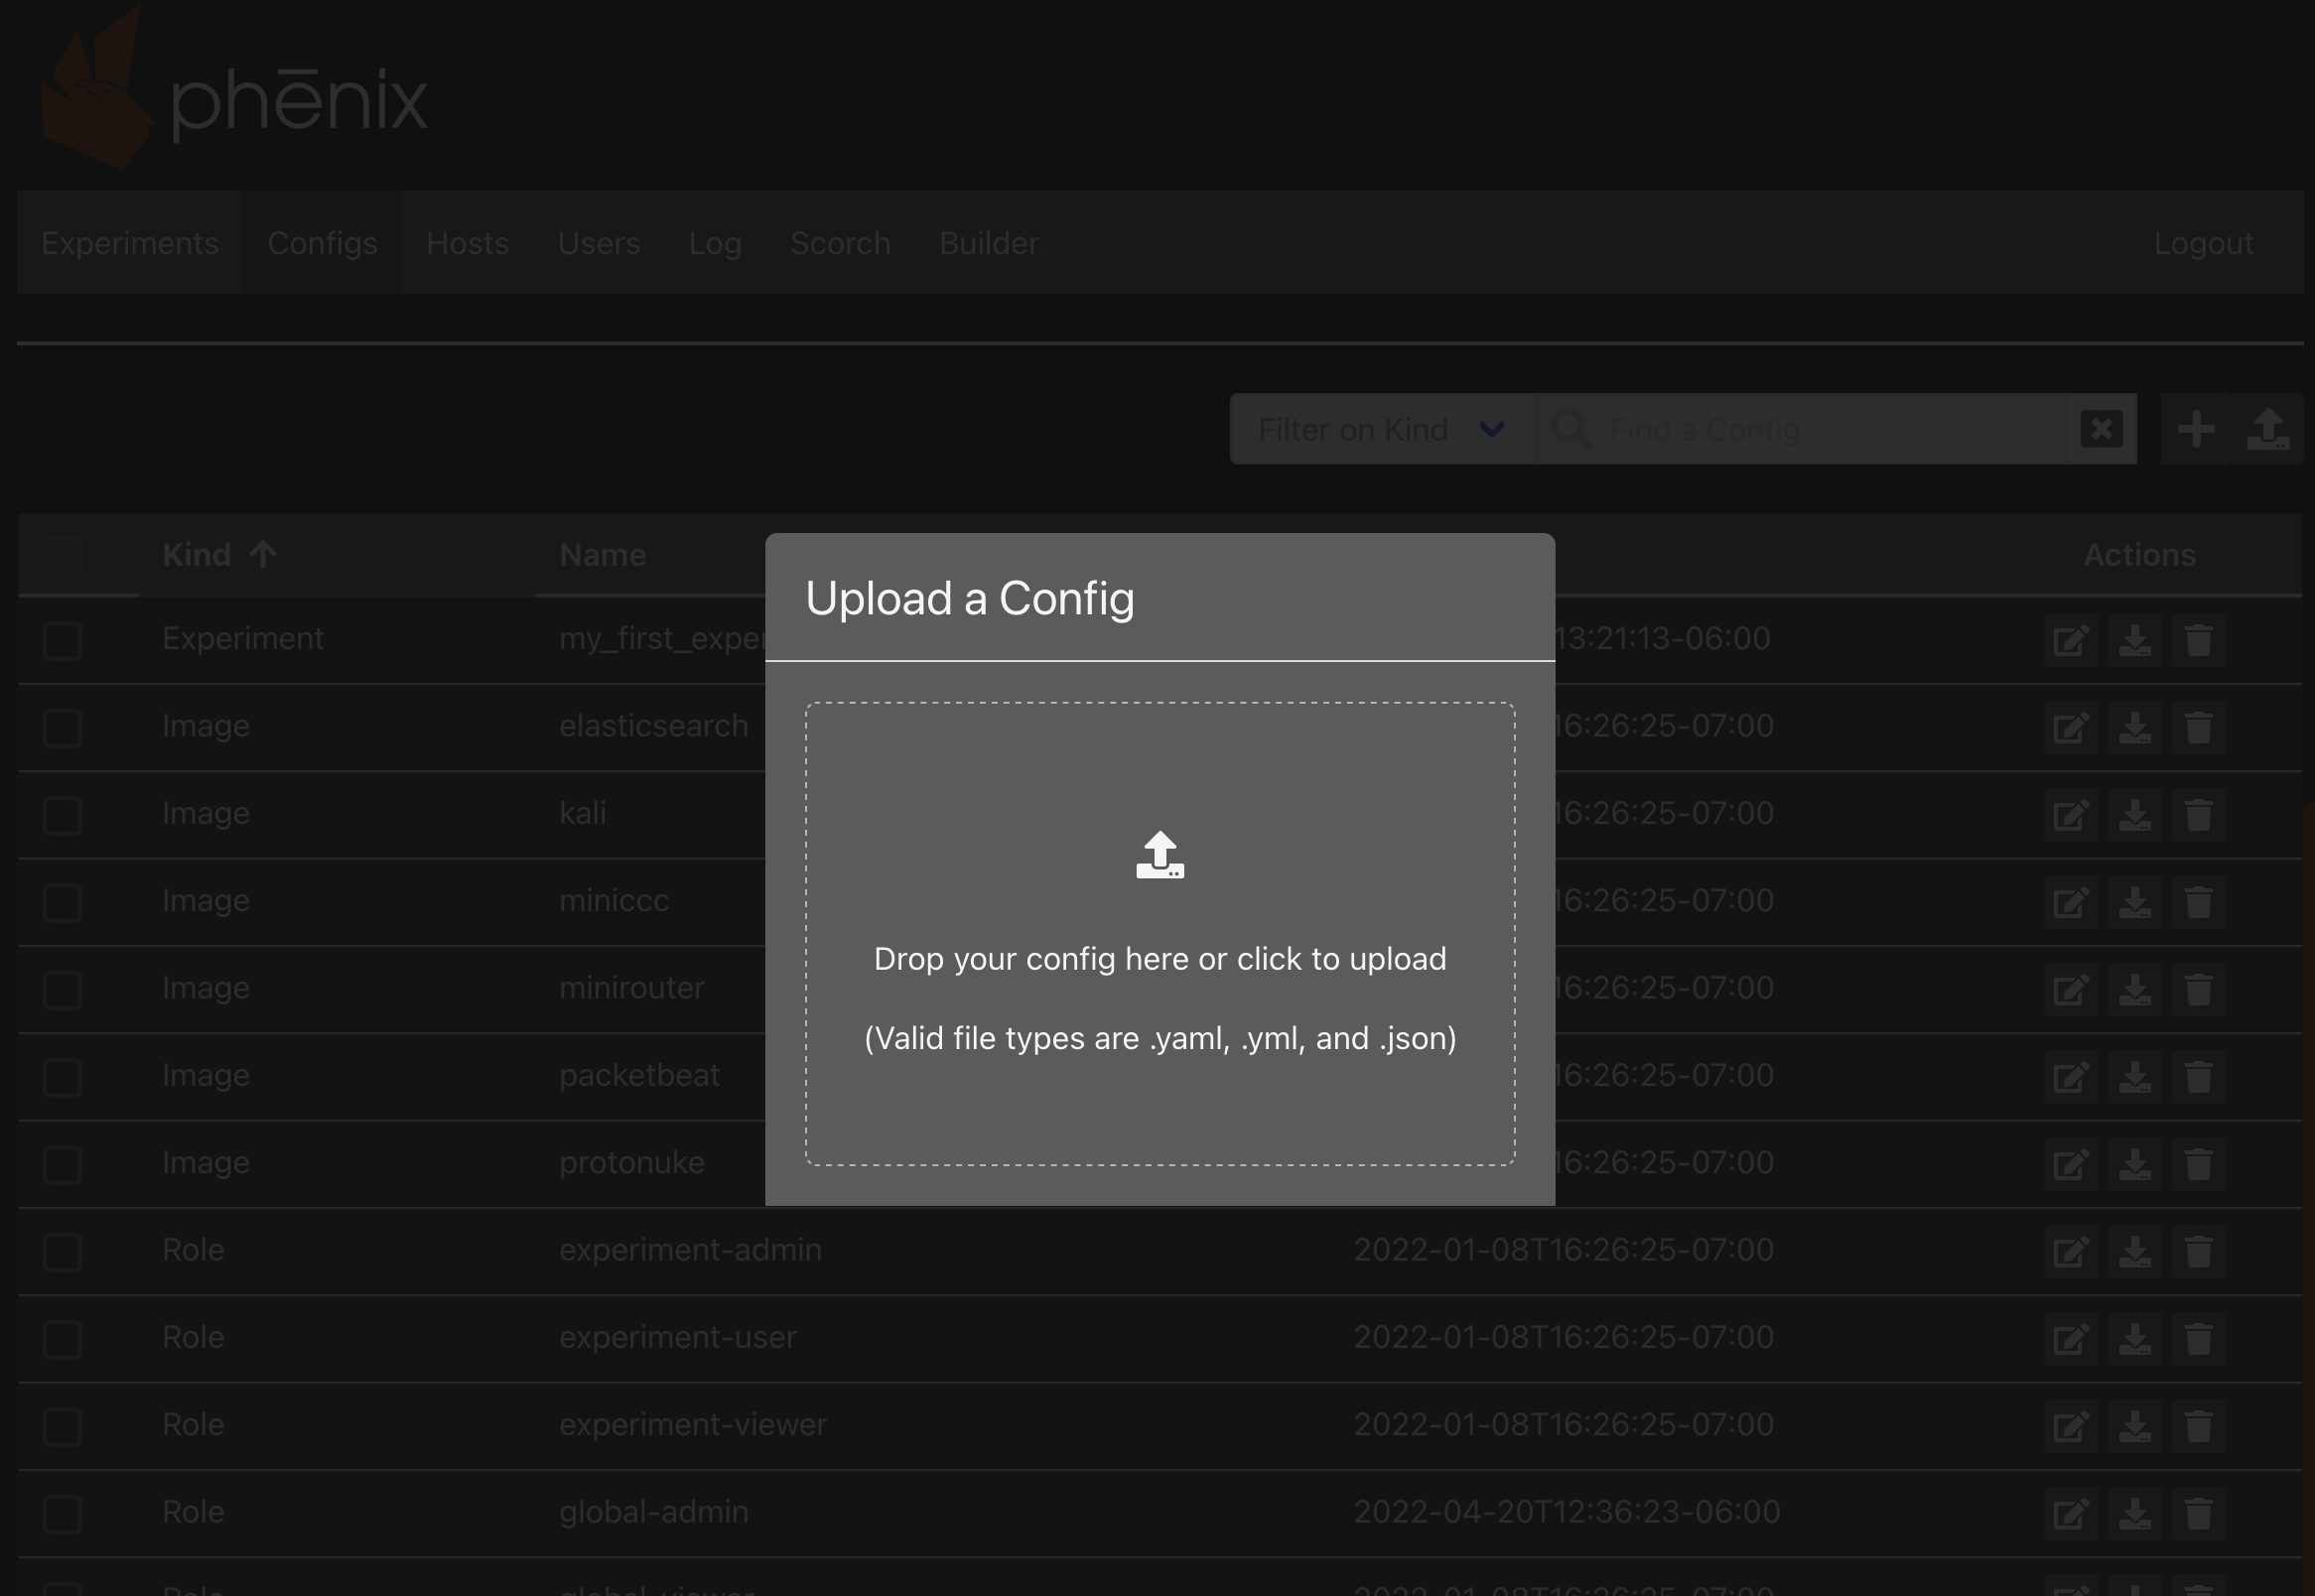
You must first upload the topology file for phēnix to ingest. From the home page, click on the
Configstab to navigate to the configurations page. Next click the button and drag/drop the
 helloworld.yamlfile into the dialog box to upload it: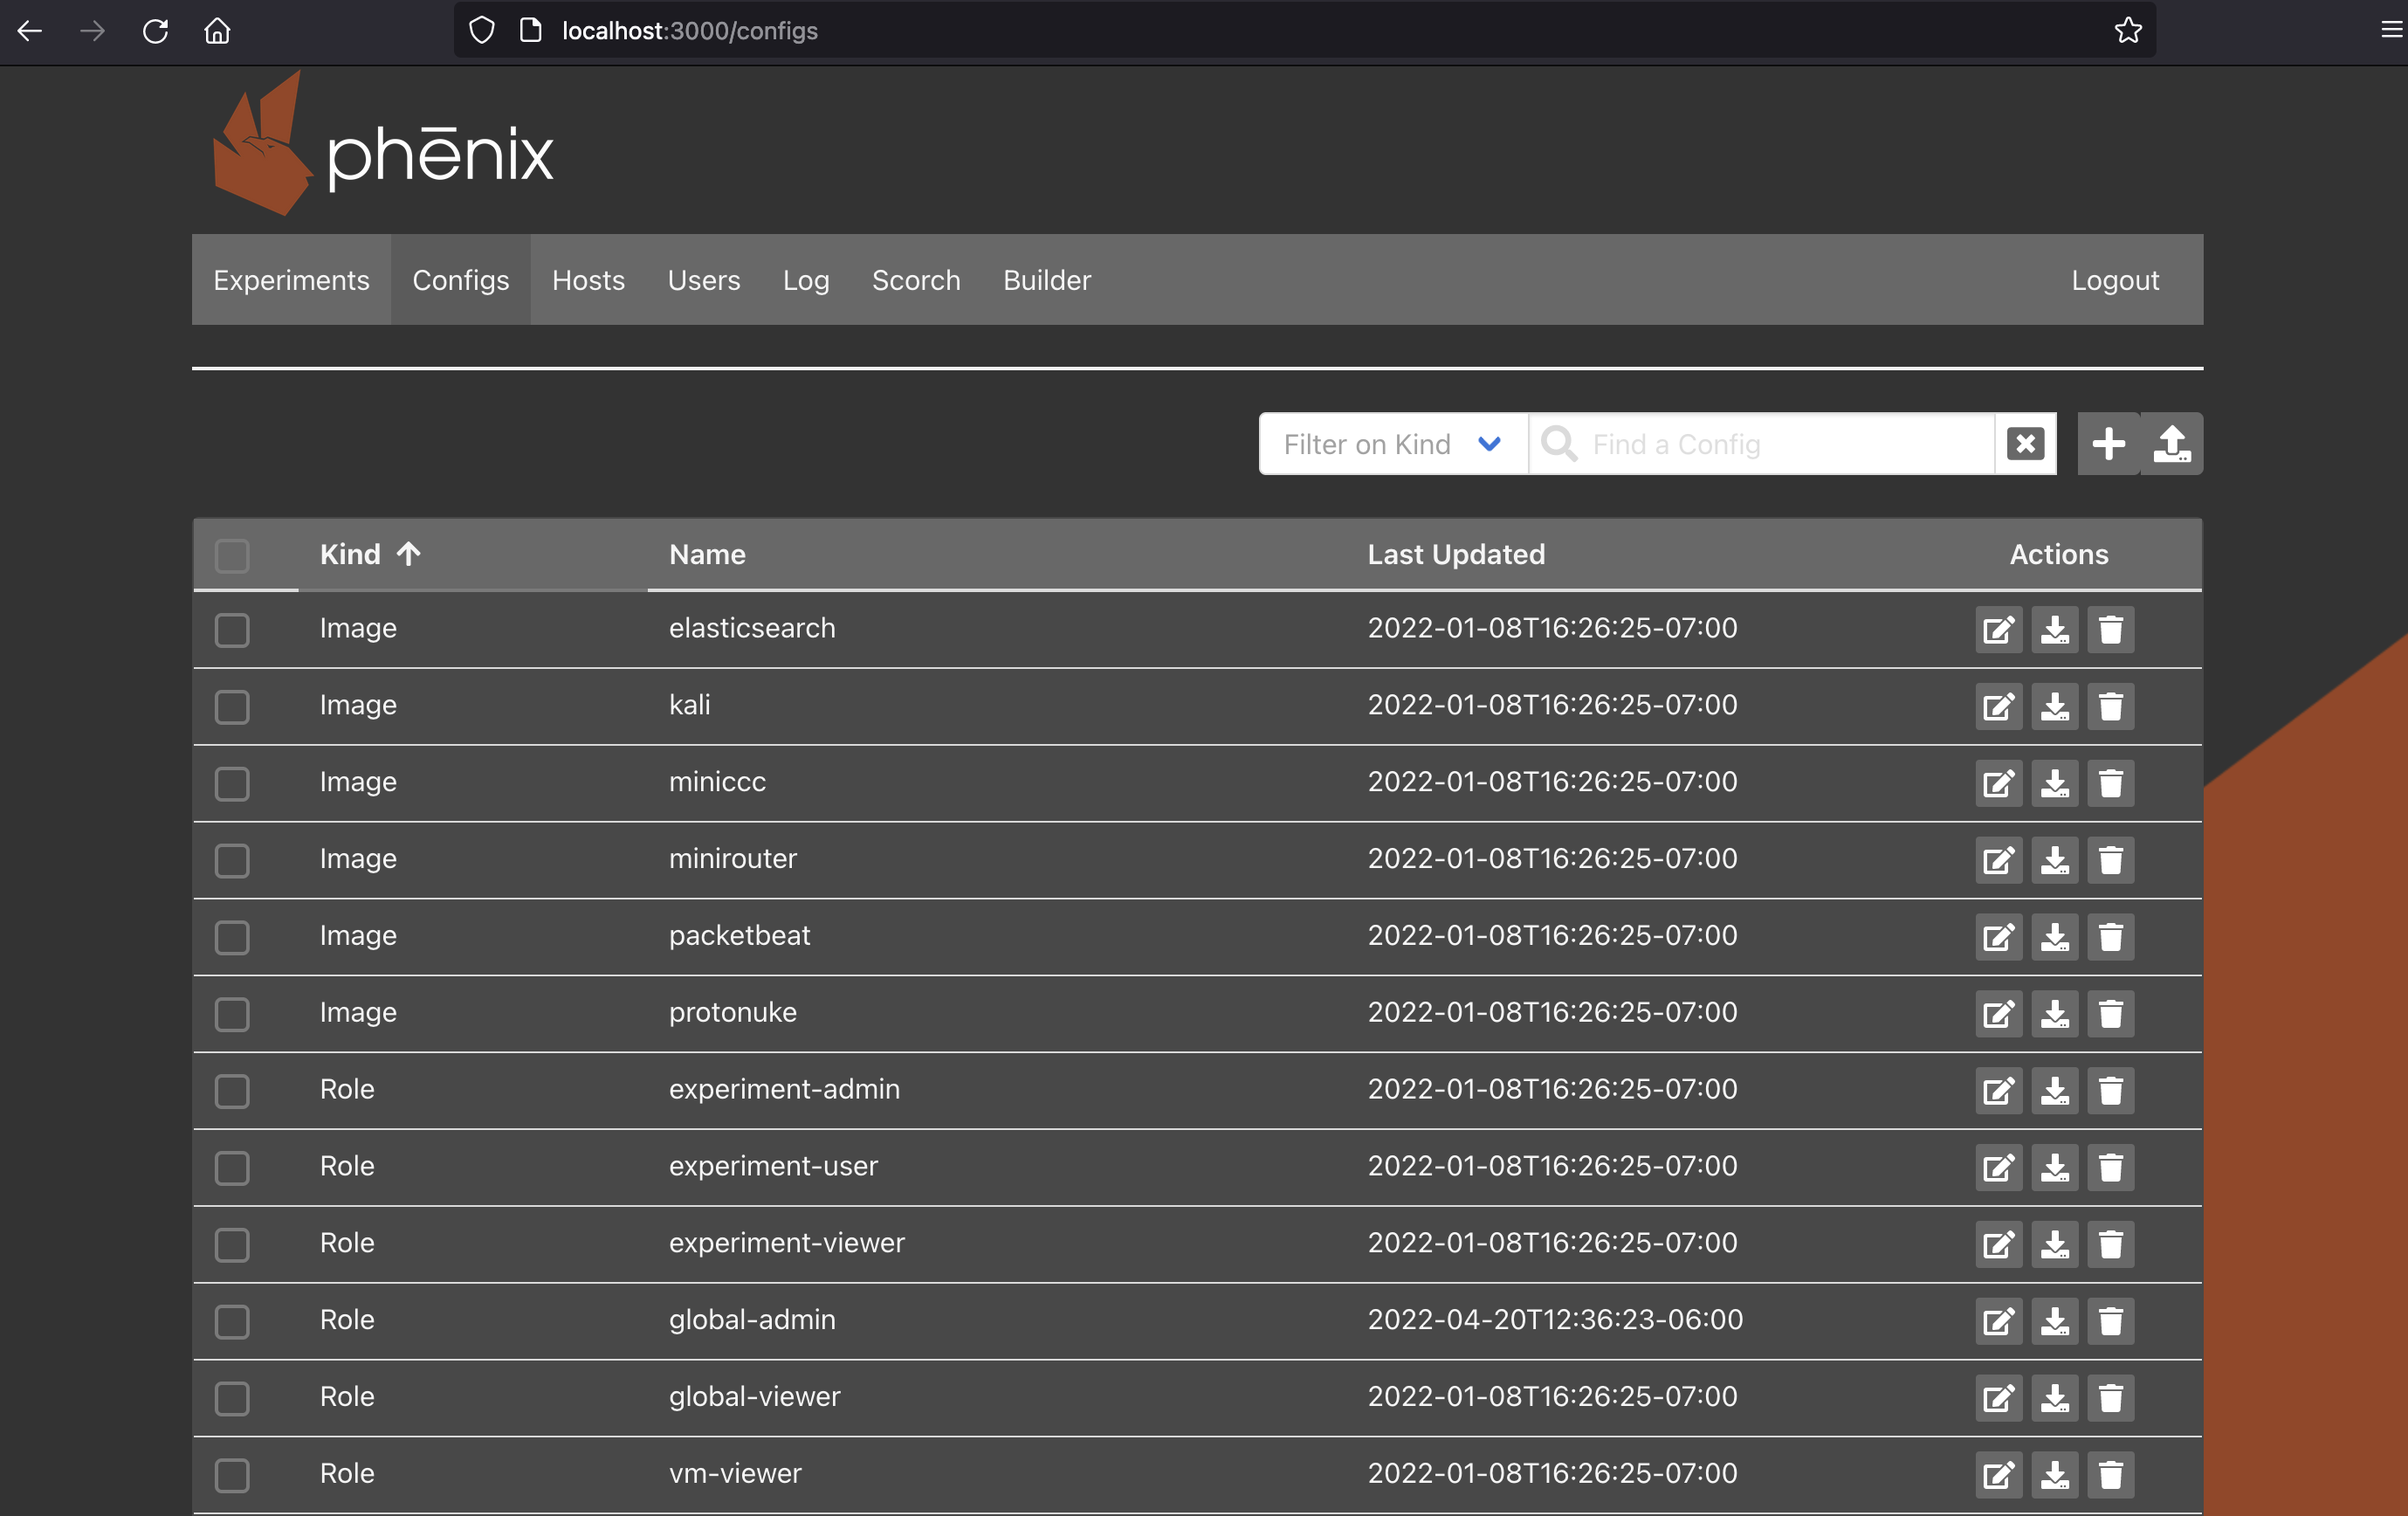
-
Alternatively, you can upload the topology via the CLI using the following command on the headnode:
phenix config create /phenix/topologies/helloworld.yaml -
You should now see the
helloworldtopology in the configs table:
-
-
Create Experiment
- Navigate back to the home page by clicking the
Experimentstab. - Click the new experiment
 button to open the create experiment dialog.
 -
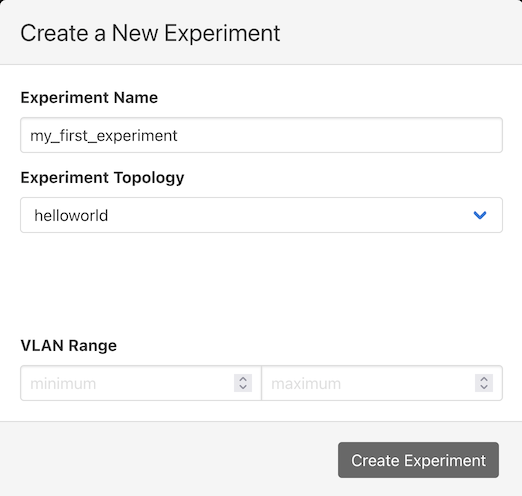
Fill out the dialog as shown (leaving everything else blank) and then click the
 button:
- Experiment Name: my_first_experiment
- Topology: helloworld
-
Alternatively, you can create the experiment via the CLI using the following command on the headnode:
phenix exp create my_first_experiment -t helloworld
- Navigate back to the home page by clicking the
-
Deploy Experiment
-
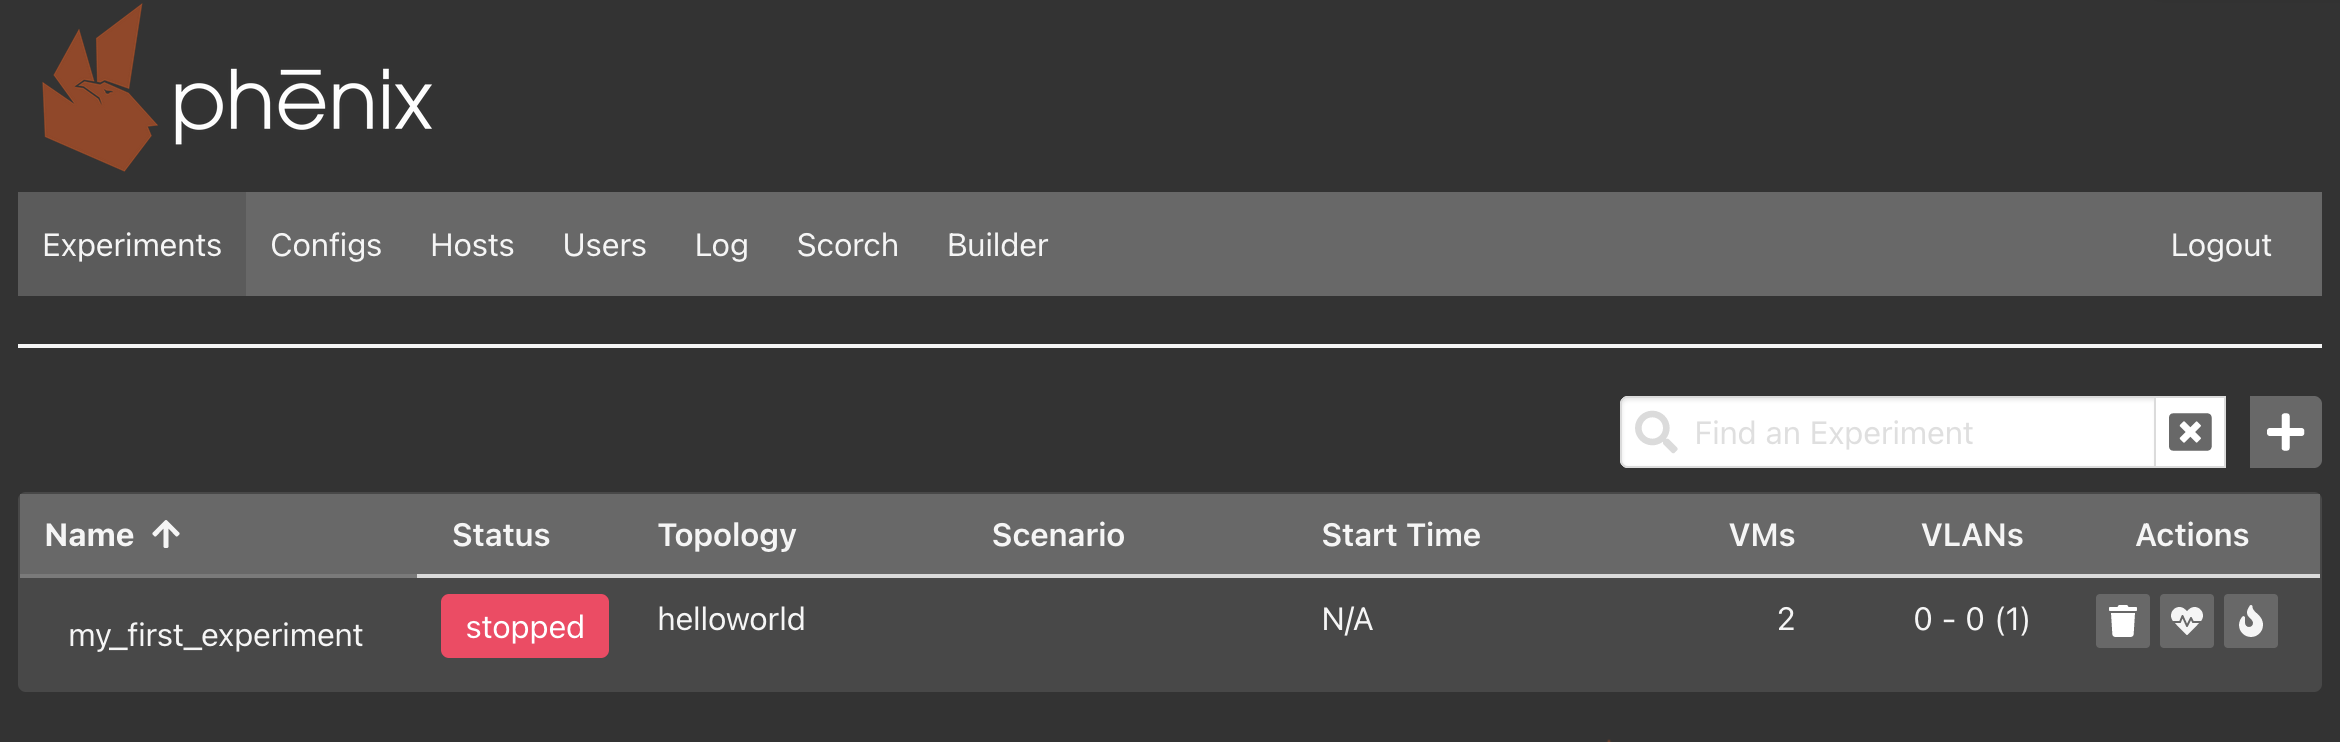
Your newly created experiment will appear in the experiments table:
-
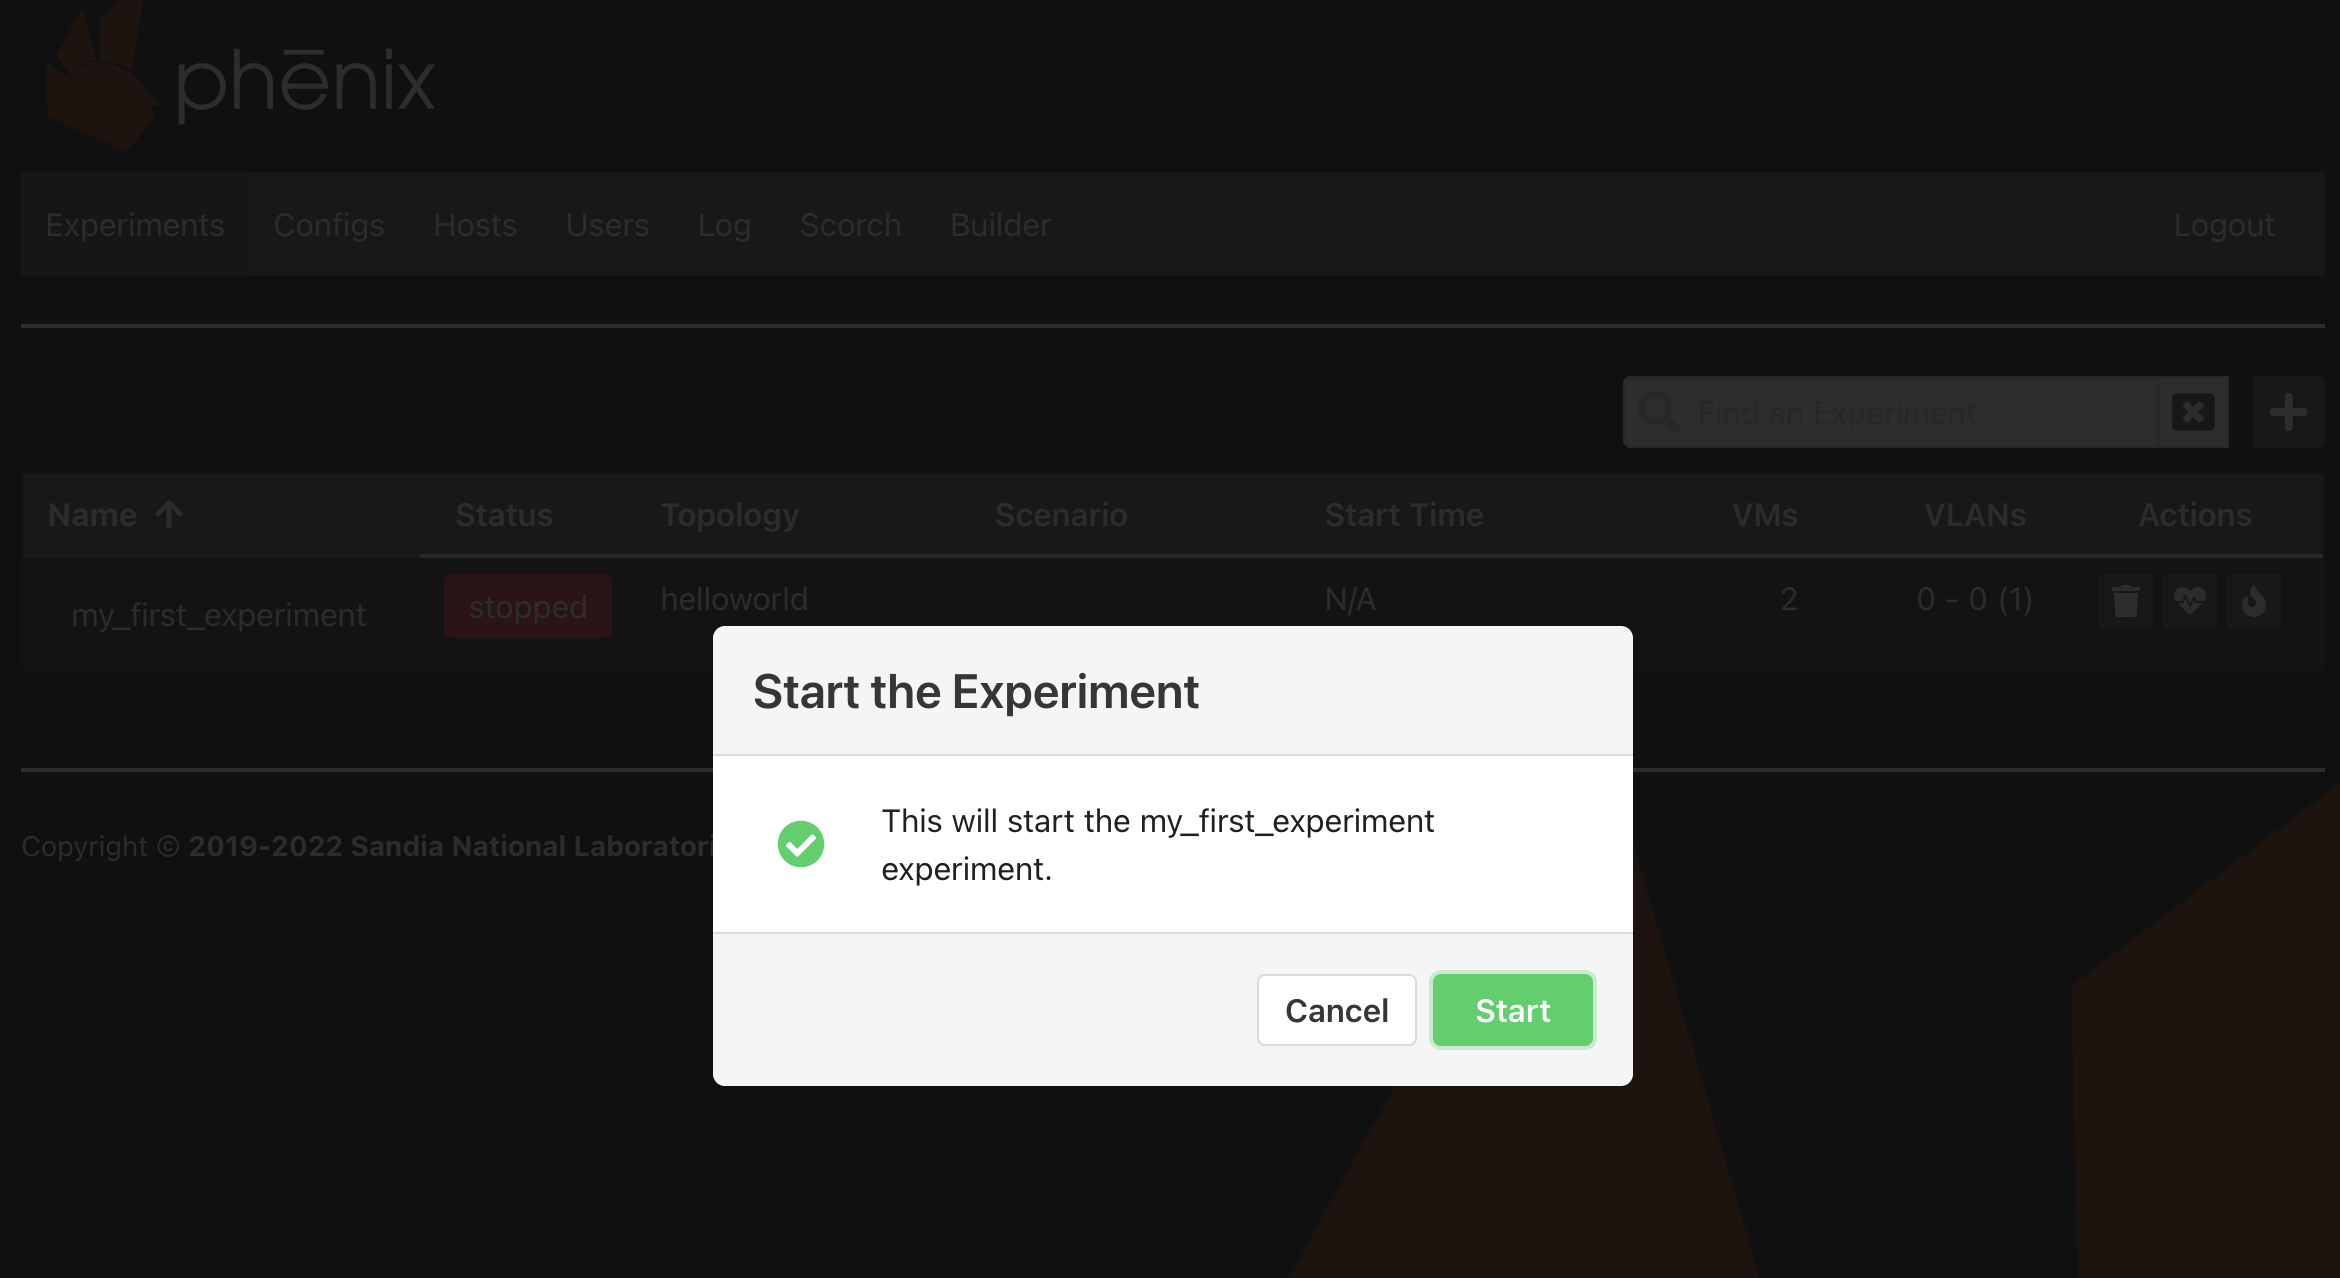
To start the experiment, click the
 button and then click
  :
:
-
Alternatively, you can deploy the experiment via the CLI using the following command on the headnode:
phenix exp start my_first_experiment -
Once your experiment starts up, its status will be marked as
 . Click on the name of the experiment
  , and phēnix will switch to the experiment info page:
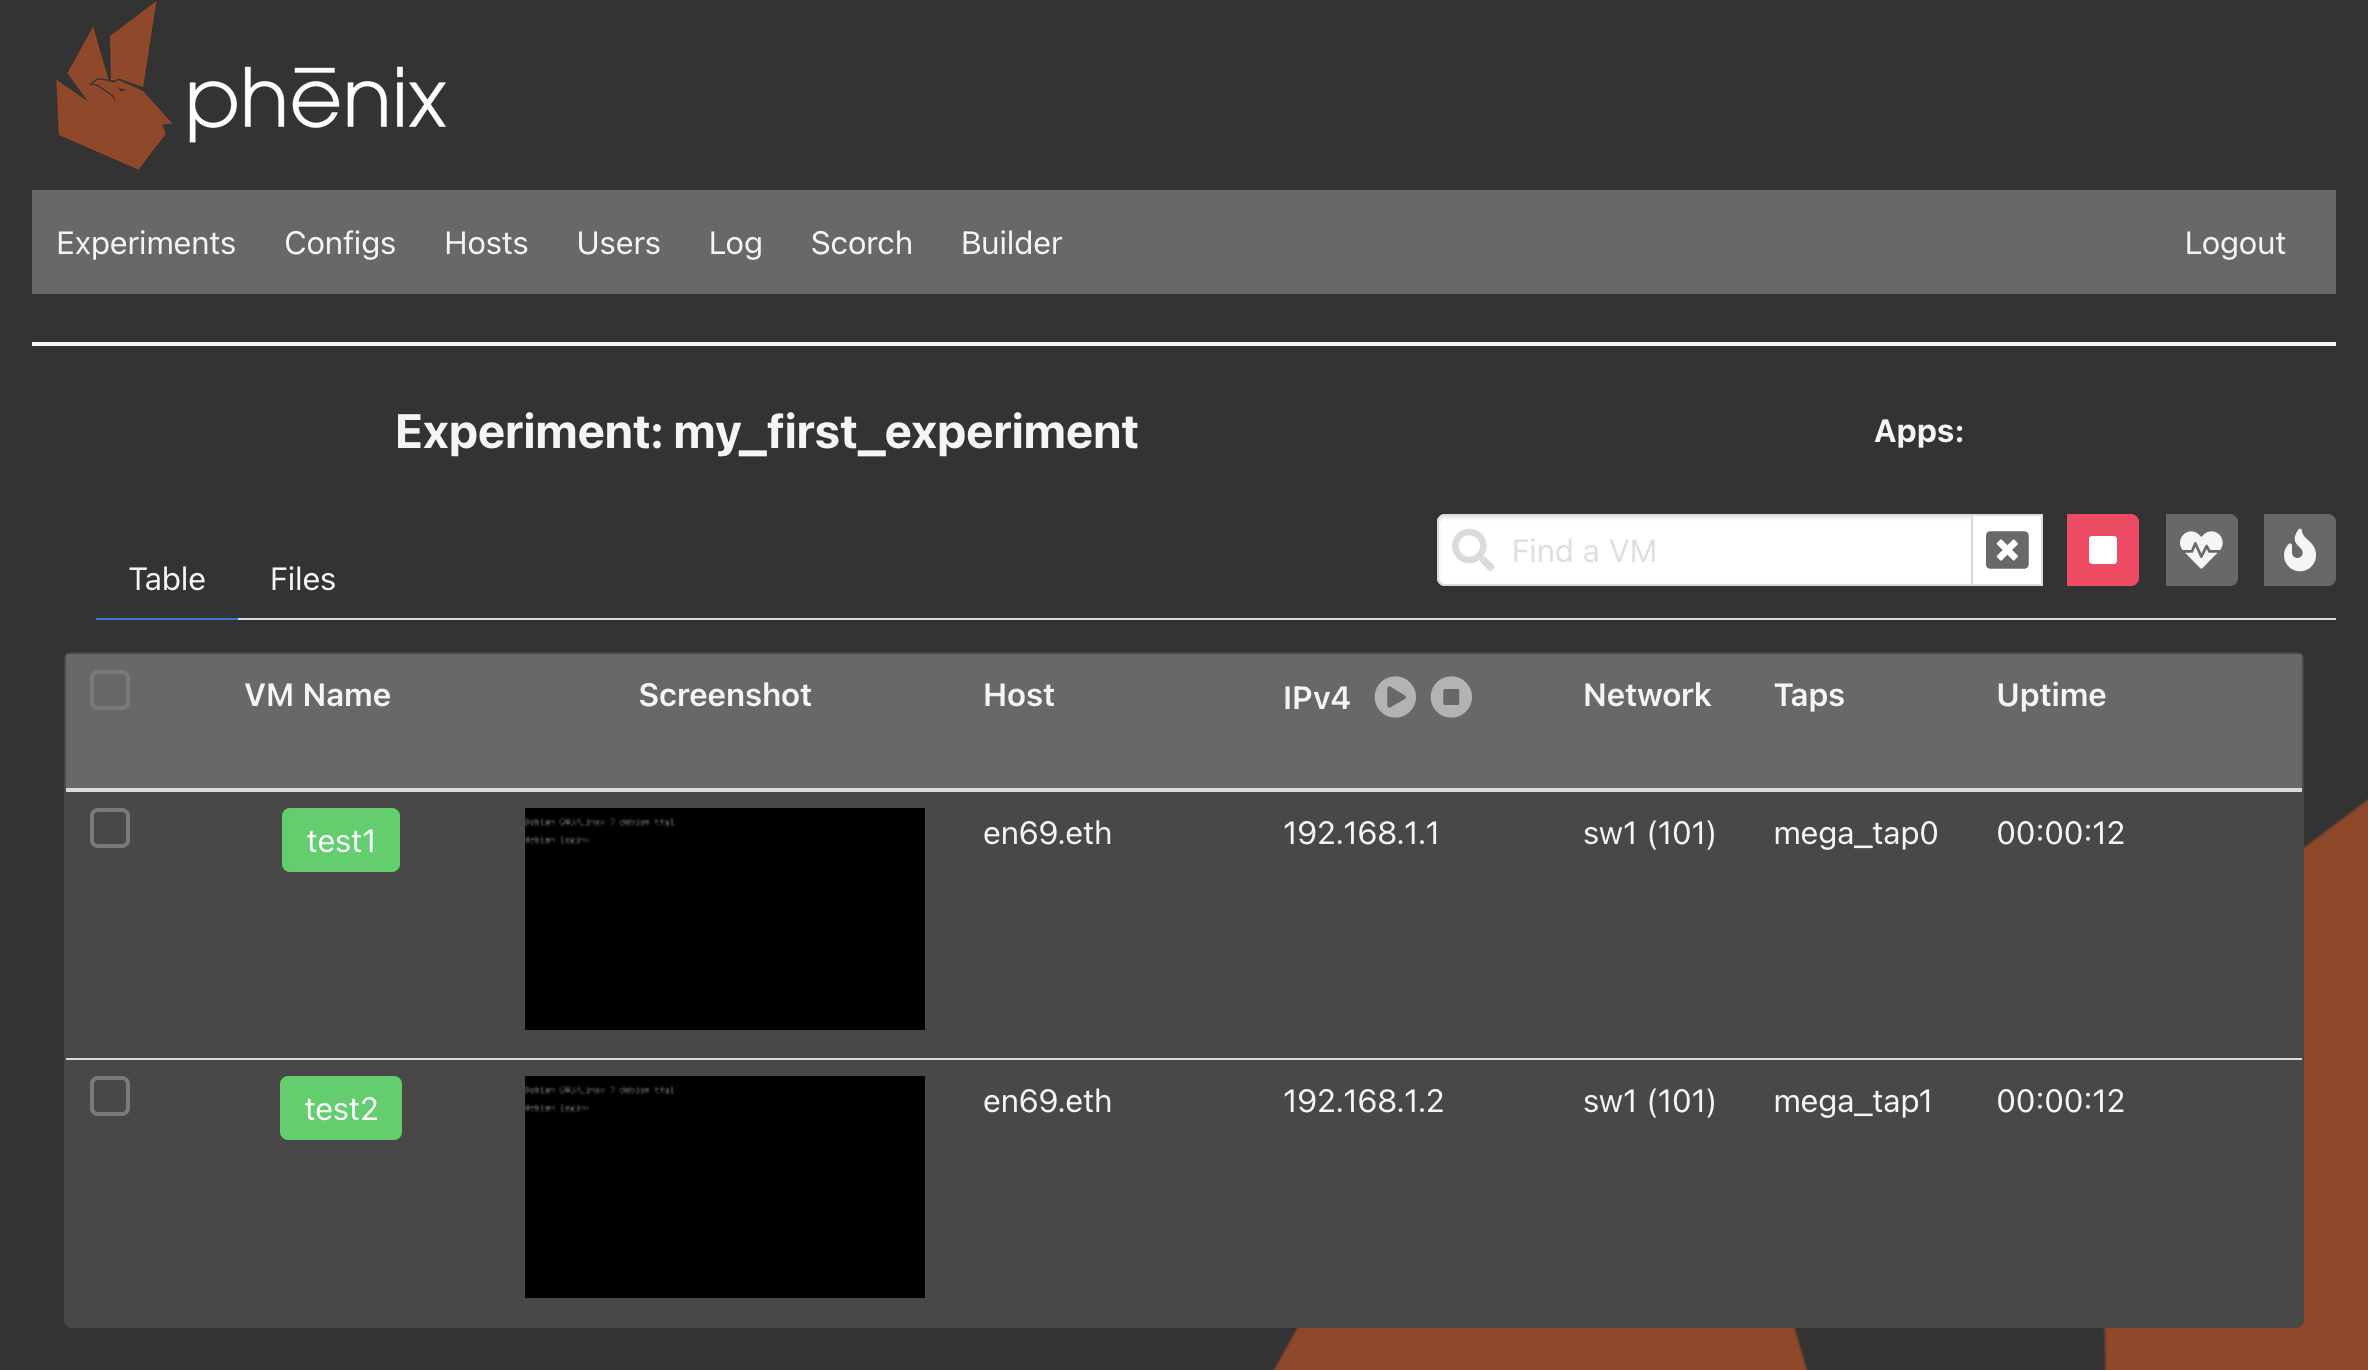
-
Tip - Click on the State of Health
 button to see a network topology map, and click the Go Back
  button to return to the Experiment Info page.
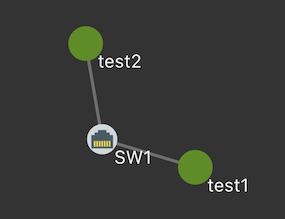
-
-
Test
- Congratulations! You’ve created and deployed your first SCEPTRE experiment.
-
From here you can interact with individual Virtual Machines (VMs) by clicking on the respective screenshot, which will open a new browser tab for that VM:

-
Login as the
rootuser for either of the VMs and trying pinging the other IP address: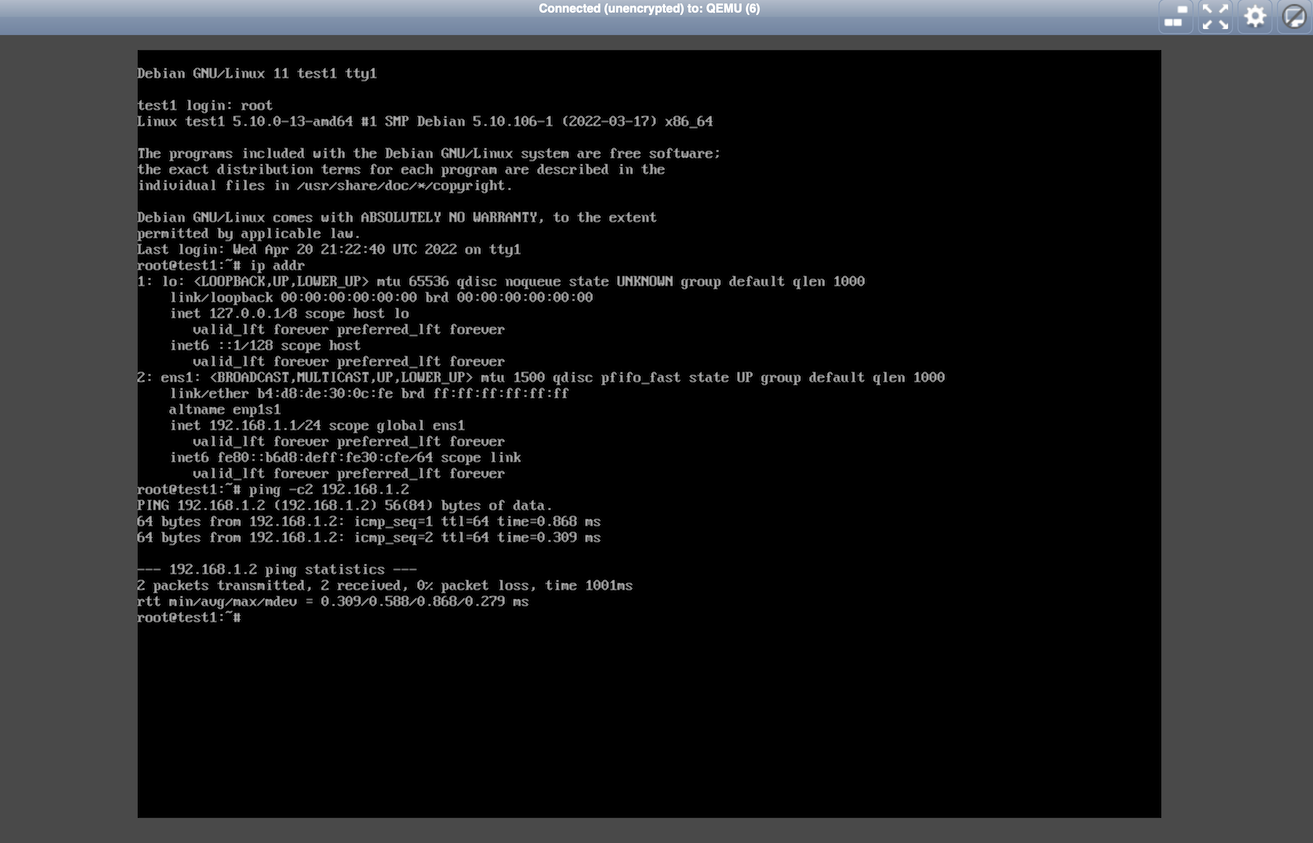
Getting Started - SCEPTRE-on-a-Platter (SOAP)
Now that you can run the basic helloworld topology, we are ready to run a topology of a notional ICS. This topology, called SCEPTRE-on-a-Platter (SOAP), models a notional SCADA system for a 300 bus microgrid system. The model uses PyPower to model the power system and Ignition SCADA software for visibility and control.
Instructions for launching the SOAP topology can be found at: SCEPTRE Phenix Topologies - SOAP
Debugging
-
Check
phenix.logandminimega.logsudo tail -f /var/log/phenix/*.log -
View container logs
  cd /opt/phenix/docker
  sudo docker compose logs -f
Getting Help
To get help with SCEPTRE, open an issue on the relevant GitHub repository, or contact us at wg-sceptre-core@sandia.gov or emulytics@sandia.gov.