11. Contributor Guide
See also
- Developer Reference
Details on development of device modules (aka “PEAT modules”), and the design decisions related to them
- Test documentation
Setting up a testing environment, running the tests, and writing new tests
- Data model
Data model documentation
11.1. How to contribute
PEAT is an open source project, and we welcome contributions from the community. Here is how you can get started:
Track the work
Submit bug report or feature request via the issue tracker or discussions on GitHub. If the idea is new/complex, we recommend that the idea is discussed before implementation, to avoid wasting time on an idea that may not be accepted due to lack of consensus.
Create a fork of PEAT
All changes will be made on your personal fork (a copy of the repository).
Create a branch.
Please use a sensible name such as
fix/slow-model-processingorfeat/my-new-feature. Commit as you progress (git addandgit commit). Ensure commits are scoped to a single change, avoid combining multiple changes into a single commit.Use descriptive commit messages that adhere to Conventional Commits, e.g.
feat: my new feature.The available types include:
feat: A new featurefixorbug: A bug fixdocsordoc: Documentation changesstyle: Changes that do not affect the meaning of the code (white-space, formatting, missing semi-colons, etc.)refactor: A code change that neither fixes a bug nor adds a featureperf: A code change that improves performancetestortests: Adding missing tests or correcting existing testsbuild: Changes that affect the build system or external dependencies (example scopes: minimega, discovery)ci: Changes to our CI configuration files and scripts (example scopes: GitLab, GitHub)chore: Other changes that don’t modify source or test filesrevert: Reverts a previous commitdepsordependencies: Changes that updates dependenciessecorsecurity: Changes that impact security of the systemdeprecate: Changes that deprecate some feature
Lint and format
The command
pdm run formatwill automatically format your code, andpdm run lintwill run quality checks.Document changes
If your change introduces new features or changes existing functionality, please update (or create) documentation in
docs/. It’s difficult to keep documentation up-to-date, so there is an emphasis on ensuring that revisions and especially new functionality is well documented.Update the CHANGELOG
PEAT uses Towncrier to manage changelog entries. Towncrier provides several benefits:
Automated changelog generation: No need to manually edit CHANGELOG.rst
Avoids merge conflicts: Multiple contributors can add their own fragment files without conflicting with each other
Consistent formatting: All entries follow the same structure
Easy contribution tracking: Each change is linked to its Pull Request or Issue
Pre-commit validation: Ensures fragments are properly formatted before commit
Flexible configuration: Fragment types can be customized in
pyproject.toml
Instead of manually editing CHANGELOG.rst, you need to create a “news fragment” file in the
newsfragments/directory.News Fragment Format:
Filename:
<PR_NUMBER>.<TYPE>.rstWhere
<PR_NUMBER>is your Pull Request number (or issue number)Where
<TYPE>is one of:feature,bugfix,doc,removal, ormisc
Example:
newsfragments/1234.feature.rstValid Fragment Types:
feature: New featuresbugfix: Bug fixesdoc: Documentation improvementsremoval: Deprecations and removalsmisc: Miscellaneous changes (content not shown in final changelog)
Content: The file should contain a brief description of your change in reStructuredText format.
Note: These fragment types are configured in
pyproject.tomlunder the[tool.towncrier]section. The configuration can be customized to add, remove, or modify fragment types as needed.Example content:
Added support for new device protocol XYZ.

This includes parsing of device configuration and status information.
Pre-commit Validation:
The pre-commit hooks will automatically validate your news fragments when you add or modify files in the
newsfragments/directory. This ensures:Fragment filenames follow the correct format
Fragment content is valid reStructuredText
Fragment types are recognized
No duplicate fragments exist
Validation and Release Process:
During the release process, GitHub Actions will automatically build the changelog from all accumulated news fragments when a new tag is pushed. The workflow validates that:
All news fragments are properly formatted
The changelog can be successfully generated
Issue references are correctly formatted
Manual Changelog Building (Optional):
If you want to preview the changelog before release, you can use:
# Preview what the changelog will look like for version X.Y.Z
towncrier build --draft --version X.Y.Z

# Or use the convenience script
./scripts/build_changelog.sh X.Y.Z

# This shows the changes but doesn't commit them
Test
When adding a new feature, add tests for that feature, and when changing existing code, ensure tests are updated to cover the changes made (e.g. if there are new edge cases or code paths).
Ensure tests pass. Run
pdm run testandpdm run test-fullto run most of the tests. Running the tests locally before submitting a pull request helps catch problems early.Squash and rebase
Ensure all changes are squashed into one or several well-formed commits, and rebase from the
mainbranch.Submit a Pull Request (PR) to the main branch
Follow the template provided when opening a request and complete all sections. If your code is not ready to merge, but you want to get feedback, please open the PR as a “Draft”. This enables discussion of the changes, and also raises awareness for others who may be working on the same or similar feature. When the PR is ready to merge, remove the “Draft” marking.
Wait for review
When a pull request is made, a reviewer will assess the code and write comments on your PR. Due to project restrictions, you may not be able to request specific reviewers to look at your code via the UI, but you can mention them in a command, e.g.
@username1 @username2 Requesting review on this PR because you are SMEs on Device X.Every single developer working on the project has their code reviewed, and we’ve come to see it as friendly conversation from which we all learn and the overall code quality benefits. Therefore, please don’t let the review discourage you from contributing: its only aim is to improve the quality of project, not to criticize. Once the code has been reviewed and all comments have been addressed, the reviewer will authorize the patch.
After approval, any maintainer may merge (rebase) the PR into
main.Update fork
After the PR is merged, you may delete the branch from your fork, and update your fork’s
mainbranch from upstream:git branch -d <branch-name> git push origin --delete <branch-name> git checkout main git fetch upstream git merge upstream/main git push origin main
11.2. Code of Conduct
The PEAT community has adopted a Code Of Conduct to ensure that we have an open and healthy community. Please review Contributor Covenant Code of Conduct for more information.
11.3. Setting up a development environment
The recommended editor is Visual Studio Code (VSCode).
There are two ways to setup a development environment, with a devcontainer or manual setup.
Devcontainer: this is the recommended method, as it’s straightforward a “batteries included” solution that avoids a lot of platform-specific issues.
Manual Setup: recommended for advanced developers or those wanting more control over their environment.
11.3.1. Devcontainer
Create a fork of the PEAT GitHub repository
Ensure Git is installed. If it isn’t, follow these instructions.
Install Docker
Linux: follow the Linux Docker install guide (NOTE: do NOT install using
snap)macOS: follow the macOS Docker install guide
Windows
Open a PowerShell terminal as an Administrator (Right-click PowerShell, click “Run as Administrator”)
Run
wsl --installReboot
Follow the Docker instructions to download and install “Docker Desktop for Windows”, and Check the box to use WSL2 backend. Use
Docker Desktop for Windows - x86_64, don’t download the Microsoft Store or ARM versions.
Follow the devcontainers setup guide for Docker, VSCode, and Devcontainers
Open a terminal
Clone your fork of the PEAT GitHub repository
git clone https://github.com/<your-username>/peat.git
cd peat
Add the main repository as a upstream remote
git remote add upstream https://github.com/sandialabs/PEAT.git
Open in VSCode
code .When prompted on bottom right to build and launch devcontainer, click button to accept. If this doesn’t appear or you dismiss it on accident, hit CTRL + SHIFT + P, then search
Dev Containers: Rebuild and Reopen in Container, and hit Enter.
11.3.2. Manual Setup
Note
On Windows, we strongly recommend using PowerShell when setting up the environment manually
Create a fork of the PEAT GitHub repository
Ensure Python 3.11 or newer is installed. The versions of Python supported by PEAT are currently 3.11 - 3.13. - Ubuntu 22.04:
sudo apt install -y python3.11 python3.11-dev python3.11-pip- Ubuntu 24.04:sudo apt install -y python3 python3-dev python3-pip(this is Python 3.12) - Windows: download from python.orgEnsure Git is installed. If it isn’t, follow these instructions.
Clone your fork of the PEAT GitHub repository
git clone https://github.com/<your-username>/peat.git
cd peat
Add the main repository as a upstream remote
git remote add upstream https://github.com/sandialabs/PEAT.git
Create virtual environment and install dependencies
pdm install -d
Ensure the install worked
pdm run peat --version
pdm run peat --help
Setup pre-commit hooks
pdm run pre-commit install
pdm run pre-commit run --all-files
Ensure linting and tests work
pdm run format
pdm run lint
pdm run test-full
11.3.3. Notes
pre-commit is used to ensure common issues are caught before they’re committed and pushed. For example, commit message format (conventional commits), linting or formatting issues, etc.
PDM is used for tooling and dependency management
Edits to the code (
.pyfiles) don’t necessitate a reinstall if environment was created with PDM (pdm install -d). You only need to install on first setup, or if the dependencies change (these are defined inpyproject.toml).Tests are run using
pytestIn the Developer reference documentation (and elsewhere), the Python source code for documented classes and functions is available by clicking the
sourcebutton on the top right of the documentation for the class or function.VSCode’s Remote Development extensions make life easier if you prefer the interface of an IDE when working on a remote server or device that’s behind a remote server (e.g. a SCEPTRE environment). This feature enables use of the GUI and most of VSCode’s numerous extensions while working on code on a remote server or in Windows Subsystem for Linux (WSL). See the VSCode documentation for details: VS Code Remote Development and Remote Development tutorials
11.3.4. Helpful PDM commands
# Run PEAT. If you make changes to the code, these will be picked up automatically.
pdm run peat

# List available scripts. "scripts" are helpers to do things like format code, build executables, etc
pdm run -l

# Run lint checks
pdm run lint

# Format code
pdm run format

# Run unit tests
pdm run test

# Run unit tests, including slow tests
# This takes significantly longer, but is more comprehensive
pdm run test-full

# Run tests for a specific version of Python
# For example, Python 3.12
pdm use -f 3.12
pdm install -d
pdm run test

# Build Windows executable with PyInstaller
pdm run build-exe

# Build Linux executable to be fully portable.
# This runs staticx to include system libraries.
# This WILL NOT work on Windows, and probably won't work with Mac.
# make sure you have the following dependencies (linux) if you run into build issues
sudo apt install -qyf python3-dev patchelf binutils scons libpq-dev libpq5 graphviz
pdm run build-linux-exe

# Sneakypeat
pdm run build-sneakypeat
pdm run build-linux-sneakypeat

# Build Python packages
pdm build
ls -lAht ./dist/
# View files in the package
pdm run wheel-files

# Build docker
pdm run build-docker
11.4. PR Review Guidelines
These are guidelines for maintainers reviewing Pull Requests with changes to PEAT’s code.
Maintainers should check all changes for the following:
PEAT is deployed on sensitive networks with potential consequences on life safety and operation of critical infrastructure. All changes should be viewed through this lens.
- Trustworthiness
Check for backdoors, malicious changes, etc., especially from untrusted contributors.
Binary or very large files (e.g. test data) should only be accepted from trusted contributors with verified provenance. This is to avoid a
xz-utilstype of situation.
- Correctness
How the changes fit into the larger codebase. Are they using the correct APIs? For example, if a file is being written, then
utils.write_file()orDeviceData.write_file()should be utilized in most cases.Are there any issues with the code that you can see?
11.5. Releases
Releases are created when the PEAT maintainers determine a release is warranted. This may be to support a upcoming deployment or exercise, or when enough notable features are added (e.g. new device modules) that warrant cutting a new release to get it in the hands of users.
11.5.1. Requirements
The Changelog is up to date
The PEAT maintainers are comfortable with the current state of the code
The GitHub Actions pipelines are passing on
mainSNL-internal GitLab CI pipeline tests are passing
Tests on closed-source datasets
Tests on the PEAT device rack (live devices)
11.5.2. Release process
Create a Git tag with the calendar version, e.g. if the date is April 2 2026, the tag should be
v2026.4.2. The tag should NOT have a description. The tag can be created from the GitHub web interface, or from the command line withgit tag.Wait for the Release workflow to finish in GitHub Actions
Verify the release in Releases:
Ensure the change list is correct
Ensure all expected artifacts are included: Linux EXE, Windows EXE, Python package (source dist and wheel), docs, sneakypeat
Download artifacts and verify they work as expected. The artifacts are tested in CI, but it’s good to be sure.
Share the release with all relevant stakeholders
Congratulations on a successful release!
11.6. Logging and printing
The Loguru library is used module is used for all logging messages (in other words, messages intended to be read by by a human user). Log messages are configured to write to stderr (not stdout), a log file, and Elasticsearch (if configured). The writing to stderr is intentional, enabling users to easily filter output from commands from the logging messages.
The use of print() and pprint() is forbidden for user messages, and should only be used for printing final results (e.g. scan result summary for a scan). In these cases, add # noqa: T001 to exclude it from linting (and # noqa: T002 for pprint()).
11.6.1. Logging levels
CRITICAL: Something went really wrong. This is usually indiciative of a bug in PEAT or a unusual system error. If something is logged at CRITICAL, it usually results in premature termination of a run of PEAT.ERROR: bad user input (e.g. a input file doesn’t exist), a high-level action failed (e.g. a pull from a device was unsuccessful when it was supposed to succeed), general system error. Issues logged at error often result in a failed PEAT run, but may not warrant terminating the run early. For example, if performing a pull from five devices, if one of the devices fail, the other four may succeed, and PEAT will proceed with finishing the pull from those devices.WARNING: anything the user should be aware of, but may not have an impact on the run or necessarily be a failure. For example, if PEAT is retrieving ten different data points, and one of the best-effort data points is unsuccessful (e.g. “battery statistics”), that may be a WARNING instead of an ERROR.INFO: General messages about how a run is progressing. These should provide enough information for the user to be aware of what is happening, without being overly verbose. If additional information is desirable, log at DEBUG level instead, then the user can enable it with the-vargument.DEBUG: verbose messages, with additional information useful for troubleshooting issues or gaining a deeper understanding of the actions PEAT is taking. These are always saved to the log file, but will only be printed to the terminal if-v(--verbose) argument is set.TRACE,TRACE2,TRACE3,TRACE4: four levels of very verbose logging for debugging and troubleshooting purposes. These are enabled by the-Vargument, e.g.-VVVwill set debugging level to 3 and enable TRACE, TRACE2, and TRACE3 messages to be logged. If DEBUG level is 0, messages logged at TRACE levels are not saved anywhere.
11.6.2. Logging usage
Using logging is fairly straightforward:
from peat import log

log.info("This is a Informational message")
log.trace("DEBUG level 1 message")
log.trace4("This will only be logged if config.DEBUG == 4, e.g. with -vVVVV arguments")

# DeviceModule classes have a log attribute, that will add the classes's name as metadata
# This example comes from m340.py
@classmethod
def _verify_snmp(cls, dev: DeviceData) -> bool:
    ...
    cls.log.trace(f"Verifying {dev.ip}:{port} via SNMP (timeout: {timeout})")

# To add information about the target of an action, such as IP address, serial port,
# hostname, etc., bind a new logger with "target" set.
# This example comes from ab_push.py
_log = log.bind(target=ip)
_log.info(
    f"Pushing firmware to {ip}:{port} (size: {utils.fmt_size(len(firmware))})"
)
11.6.3. Advanced logging
Logging format can be customized at runtime using Loguru’s environment variables. The main reason you’d need to use this is if there are color issues with certain terminals. Instead of disabling colors entirely with --no-color, you can customize the problematic color with LOGURU_<LEVEL>_COLOR, e.g. LOGURU_DEBUG_COLOR to set the color for DEBUG-level messages.
11.7. Guidelines and policies
11.7.1. Code style
PEP8 should be adhered to, with the exception of line length can go up to 88 characters, and certain lines can be excluded with
# noqa: E501.Run
pdm run formatto format your code before pushing. There’s no longer a need to worry about formatting, it’s all handled for you. Under the hood, the Ruff formatter is used for formatting and Ruff’s isort check is used for import sorting.Docstrings should follow PEP-257.
Argument and Returns in function docstrings should follow the Googleformat (Examples).
TODOcomments are permitted. However, if theTODOis significant you should discuss it with the team or open a issue on GitHub.
11.7.2. Git
All changes to PEAT should be worked on in a Git branch. Changes directly to the main branch (
develop) will be rejected.All branches are merged using a GitHub Pull Request (PR).
When work is nearing completion, create a Pull Request, and prefix the title with
"Draft: ". This increases visibility in advance of the reviewing phase, and enables discussion.All Pull Requests should have a code review by another PEAT developer. Reviewers should check that the change is reasonable and complete, check for potential issues or edge cases, and look for anything that jumps out at them or seems “fishy”.
Requirements before merging an PR:
Add your name and any other contributors to the feature to
AUTHORSAdd and/or update the list of authors in the relevant module-level docstring(s) for your changing, including email addresses. This makes it clear who to contact about a particular portion of the codebase.
There is a minimal set of tests for the change (if applicable)
GitHub Actions CI pipeline passes
Code has been been reviewed by a PEAT maintainer (if committer is not a PEAT maintainer)
11.7.3. Versioning
Versions are manually tagged with a calendar version, e.g. 2024.5.6 for a tag on May 6th, 2024. The version used for the package internally will be a automatically generated version, e.g. 2024.5.6.dev801+gf79832d6.d20240506.
11.7.4. Type annotations
Python type annotations are used for all methods and functions, and when it makes sense for variables (e.g. if there’s ambiguity about the type of a variable). While at first glance it seems overly verbose and “unpythonic” (after all, one of Python’s core strengths is it’s dynamic “duck” typing), there are a number of reasons we use them:
They document expected types, which has been especially useful for the deep device-level code, which is difficult to untangle if you aren’t the original developer (the ControlLogix code is the nastiest example of this).
They are used as part of the documentation generation process to add the types (instead of putting the types in the docstrings, which are often not updated).
The mypy static analyzer is used to catch typing errors.
Linters (e.g. Pylance in VSCode) can help you avoid silly mistakes, like providing arguments in the wrong order.
11.7.5. Exception handling
The methodology for exception handling in PEAT differs somewhat from Python’s guidance and common practices. It can be summed up as this: “get as much data as possible and fail safely”. If a function or function to collect some data fails, then log that it failed and continue trying other methods. This can be implemented by wrapping code that may fail in a try/except statement and handle the generic Exception class. If the failure is critical to the continued operation of the collection or has the potential to affect the device’s operation, then log the issue in detail and re-raise the exception so that device’s run is terminated. This methodology is why try: ...; except Exception: ... is used in various places.
11.7.6. Other conventions
Timestamps are assumed to be in the UTC timezone unless there is a specific reason for them not to be, e.g value recovered from device with a unknown timezone.
datetimeobjects should be timezone-awareUTF-8 encoding is used for all files (unless required and documented otherwise)
All hashes should be SHA 256
Strings
Raw data should be
bytestype. Use ofbytearrayor other related types should be avoided, except for intermediate representations (e.g. building a binary file chunk by chunk).Convert from
strtobytesusingstr.encode(), and vice-versa usingbytes.decodestrobjects should be"utf-8"Refer to this guide for converting escaped hex to hex, and vice-versa
11.8. Project structure
.dockerignoreFiles to ignore when building the Docker containers (Syntax reference).editorconfigConsistent configuration baseline used by many editors and IDEs (Reference).gitattributesControls how Git treats file types and line endings (for example, it ensures Bash scripts always haveLFline endings, even when the repository is cloned on Windows).gitignoreAnything that shouldn’t be pushed to GitHub, like temp files and virtual environmentsAUTHORSEveryone who has contributed to PEATDockerfileUsed to build a Docker image for the PEAT CLILICENSELicensingpdm.lockUsed by PDM to pin the versions of dependencies based on what’s defined inpyproject.toml, and ensure their SHA256 hashes match when installing.pyproject.tomlConfiguration for the project, including Python packaging metadata, configurations for tools such aspytest,ruff, andmypy, and dependencies. It also controls how the PEAT python package is built and installed. This is whatpipuses when you runpip install ..README.mdBasic documentation that shows up on GitHub project homepage
11.8.1. distribution
Anything related to installing, packaging, or distributing PEAT. See the Packaging and distribution of PEAT for further details.
build-docker.shBuilds the Container image.build-linux-package.shCreates a portable PEAT executable on Linux. This is the preferred method of distributing and installing PEAT on Linux.file_version_info.txtUsed by PyInstaller to add metadata to the final Windows executable. DO NOT MODIFY unless you know what you’re doing.linux-install-script.shInstalls the PEAT executable in/usr/local/bin, the man page in/usr/local/share/man/man1/, and updates themandb. Intended to be distributed with the Linux executable and the man page (peat.1).peat.specPyInstaller spec for building portable PEAT executables (for both Linux and Windows)peat_icon.icoIcon file used for the Windows executable
11.8.2. examples
Example output from PEAT runs, examples of device input files and parsed outputs, example PEAT module, etc.
11.8.3. peat
Python source code for the peat module.
api/*High-level “wrapper” APIs, e.g.pull_apidata/*Data model implementationmodules/*Device modules included with PEATparsing/*General parsing-related code, including Structured Text TC6 XML logic parsing functionsprotocols/*General network-related code, including protocol implementations, typecode definitions, wrapper classes (e.g.HTTP) and utility functions__init__.pyTop-level imports for thepeatPython package (Further reading: What is init.py for?)__main__.pyEntrypoint for the Command Line Interface (CLI)cli_args.pyCommand line interface argument definitions, help messages, usage examples, and parsing functionscli_main.pyCore logic for the CLI (this gets called by__main__.py)consts.pyConstants (global variables) such as system information, as well as functions that need to be “import-safe” without cross-dependencies on other PEAT modulesdevice.pyDefines theDeviceModulebase class used (subclassed) by all PEAT device modules (everything inpeat/modules/)elastic.pyElasticsearch interface implementation, includingElastices_mappings.pyElasticsearch type mappingsinit.pyInitialization functions, including loading of configurations and Elasticsearch initializationlog_utils.pyLogging-related functionsmodule_manager.pyThe special sauce behind PEAT’s dynamic device module API (peat.module_api). TheModuleManagermanages all imported PEATDeviceModulemodules and provides methods to lookup a module or import a new module.settings.pyConfiguration and state definitions, includingconfigandstatesettings_manager.pyTheSettingsManagerclassutils.pyVarious utility functions that are used throughout PEAT
11.8.4. tests
Anything related to testing, including unit tests and test infrastructure (such as Docker containers). Refer to the Test documentation for further details on testing.
modules/Unit tests for PEATDeviceModulemodules (peat/modules/)protocols/Unit tests for protocols (peat/protocols/)conftest.pyConfiguration forpytest
11.8.5. Kibana Dashboards and Visualizations
Principles
Be deliberate, know your user and the questions they are asking
Keep it simple, don’t force users to scroll and remember
Make more linked dashboards if needed
Put important information in important places
Use a grid and favor charts that are a bit wider than tall
Recommended reading
11.9. Configuration and state deep dive
Before proceeding, make sure you’re familiar with the regular methods of configuring PEAT, such as environment variables, configuration file, and CLI arguments. Refer to Operate for details.
PEAT uses global singletons (”registries”) to manage it’s configuration and state. These singletons are config, which is an instance of Configuration, and state, which is an instance of State, and both are subclasses (inherit from) SettingsManager. Refer to the Settings section for details on the APIs of these classes.
These singletons can be safely imported and used anywhere in PEAT or in third party code. Examples:
from peat import config
from peat import state
Changes are applied and available immediately, regardless of when imports occur, as you may be used to from other systems or methods of configuration. This provides flexibility and safety to read and write values from anywhere in the code and at any phase of execution.
>>> from peat import config
>>> config.DEBUG
0
>>> config.DEBUG = 2
>>> config.DEBUG
2
Modifications to the configuration or state can be performed via runtime changes, environment variables, or a JSON config file. These changes are always saved in the object in a ChainMap stored in the special "CONFIG" key on the object. The value that actually gets used when accessed at runtime depends on the order of precedence, which is documented in the Settings section.
The data types of values are automatically checked and converted when loaded from environment variables or JSON files. The data type is defined via Python type annotation syntax on the class variable. The checking and conversion is implemented in typecast(). Some example type conversions:
Variables with a type of
Pathaccept filesystem path strings in most input methods (e.g. config file), and gets massaged to aPathobject internally.boolvariables accept various forms of truth, including “1”, “0”, “yes”, “no”, “false”, and others.
Warning
Runtime changes directly to attributes (e.g. config.DEBUG = 2) are NOT type checked or automatically converted. Ensure you are using the proper type!
11.9.1. Configuration changes from command line arguments
Command line arguments with a name matching the value’s name are automatically loaded into the configuration and assigned as runtime changes. For example, a command line argument with the name --print-results will modify the value for config.PRINT_RESULTS. Note that only the configuration is automatically modified by command line arguments, the state cannot be changed via the CLI by default. This automatic loading occurs in peat.init.initialize_peat(), with the conf argument containing a dictionary of the CLI arguments passed from peat.cli_main.run_peat()
11.9.2. Adding a attribute to the configuration or state
To add a new value to the state or configuration, simply add an attribute to the appropriate class (Configuration or State). The attribute MUST include a type annotation and a default value, as well as a comment describing the attribute. For example:
class Configuration(SettingsManager):
    ...
    # Modifies the coolness of a run
    COOLNESS_FACTOR: int = 0
    ...
The variable can now be set via environment variables or JSON configuration files, for example:
# Traditional export
export PEAT_COOLNESS_FACTOR=9001
peat parse examples/

# Modify only for this command execution
PEAT_COOLNESS_FACTOR=9001 peat parse examples/
The corresponding command line argument is not added automatically, and must be manually added to build_argument_parser() in peat.cli_args. If the argument should be available to all commands, add it to the 'general arguments' group in the subparsers for loop, e.g. group.add_argument(...). Otherwise, add it to the appropriate command parser, e.g. scan_parser.add_argument(...) or to a for loop for multiple command parsers (e.g. for scan and pull).
group.add_argument(
    '-o', '--out-dir', type=str, metavar='PATH', default=None,
    help='Output directory for any files PEAT creates. '
         'Defaults to "peat_results" in the current directory.'
)
Refer to the Usage documentation Output section for details on PEAT’s file output and examples of the structure.
11.10. Landmines
Some areas of the code are more sensitive or complex than others. If you are confused or unsure about a change, talk to the other developers (git history can help determine who to talk to). I’ll try to document here anything that is sensitive or is using advanced Python features that may not be obvious to someone not immersed in the language.
Areas of note:
peat/__init__.py: Special setup for Loguru, including custom logging levels, handler for Elasticsearch, and customizing log levels for third-party loggers (e.g. Scapy). The order of imports matters in this file!peat/device.py: TheDeviceModulebase class overrides some “magic methods” (__<method>__) and provides methods that are overridden by subclasses.peat/settings.py:settingsabsolutely cannot import or rely on otherpeatPython modules, since it is imported by practically everything else (stateandconfig). There is a heavy amount of advanced Python hackery happening here, some of which is explained with comments. The only changes most developers will need to make in here are adding/changing configuration or state variables.peat/consts.py: must be mostly static at runtime and absolutely cannot import other Python modules frompeat, since it contains values that are imported and used across the codebase. Use this for anything that is determined at runtime or never changes. Several examples are string formats and platform information (e.g. the OS PEAT is running on).peat/init.py:initialize_peat()is a workaround for the fact we support multiple independent ways of using PEAT (the CLI, the HTTP server, and as a Python package).Multiple classes use the Python
@propertyfeature, read the official documentation for details: Python docs - PropertyMultiple classes implement Python built-in methods, commonly known as “magic” or “dunder” methods. These include
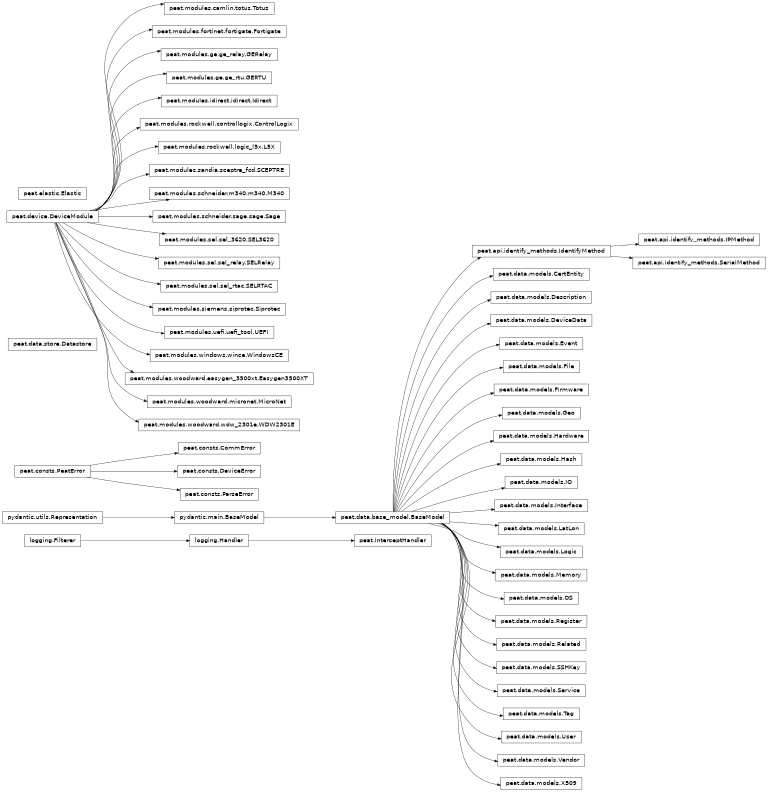
__str__,__repr__, and others. Check the Python documentation for more details and a full listing: Python docs - Data Modelpeat/data/*: the data models use Pydantic to provide a nice interface for working with data from devices. They process, store and manage device data and provide the structure/schema and associated documentation for said data. Changes here have the potential to affect every module in PEAT. Therefore, as with anything critical, think twice, write tests, and ask questions.
11.11. Class hierarchy