GUI
pytribeam includes a native GUI built on python standard libraries to assist users with the creation of configuration files and to start and monitor experiments. Use of the GUI is the recommended mode of operation of the package, but users can also run an experiment directly from the command line (see command line interface for more details on this functionality).
After a successful install of the package following the installation instructions, users can launch the GUI in one of two ways:
- running the command
pytribeam_guifrom any console. The console must stay open while the GUI application is running. - running the included
GUI.ps1script with powershell by right-clicking on the icon and selecting "Run with PowerShell". This will only open the GUI window.
Users should see the following landing page when loading the GUI:
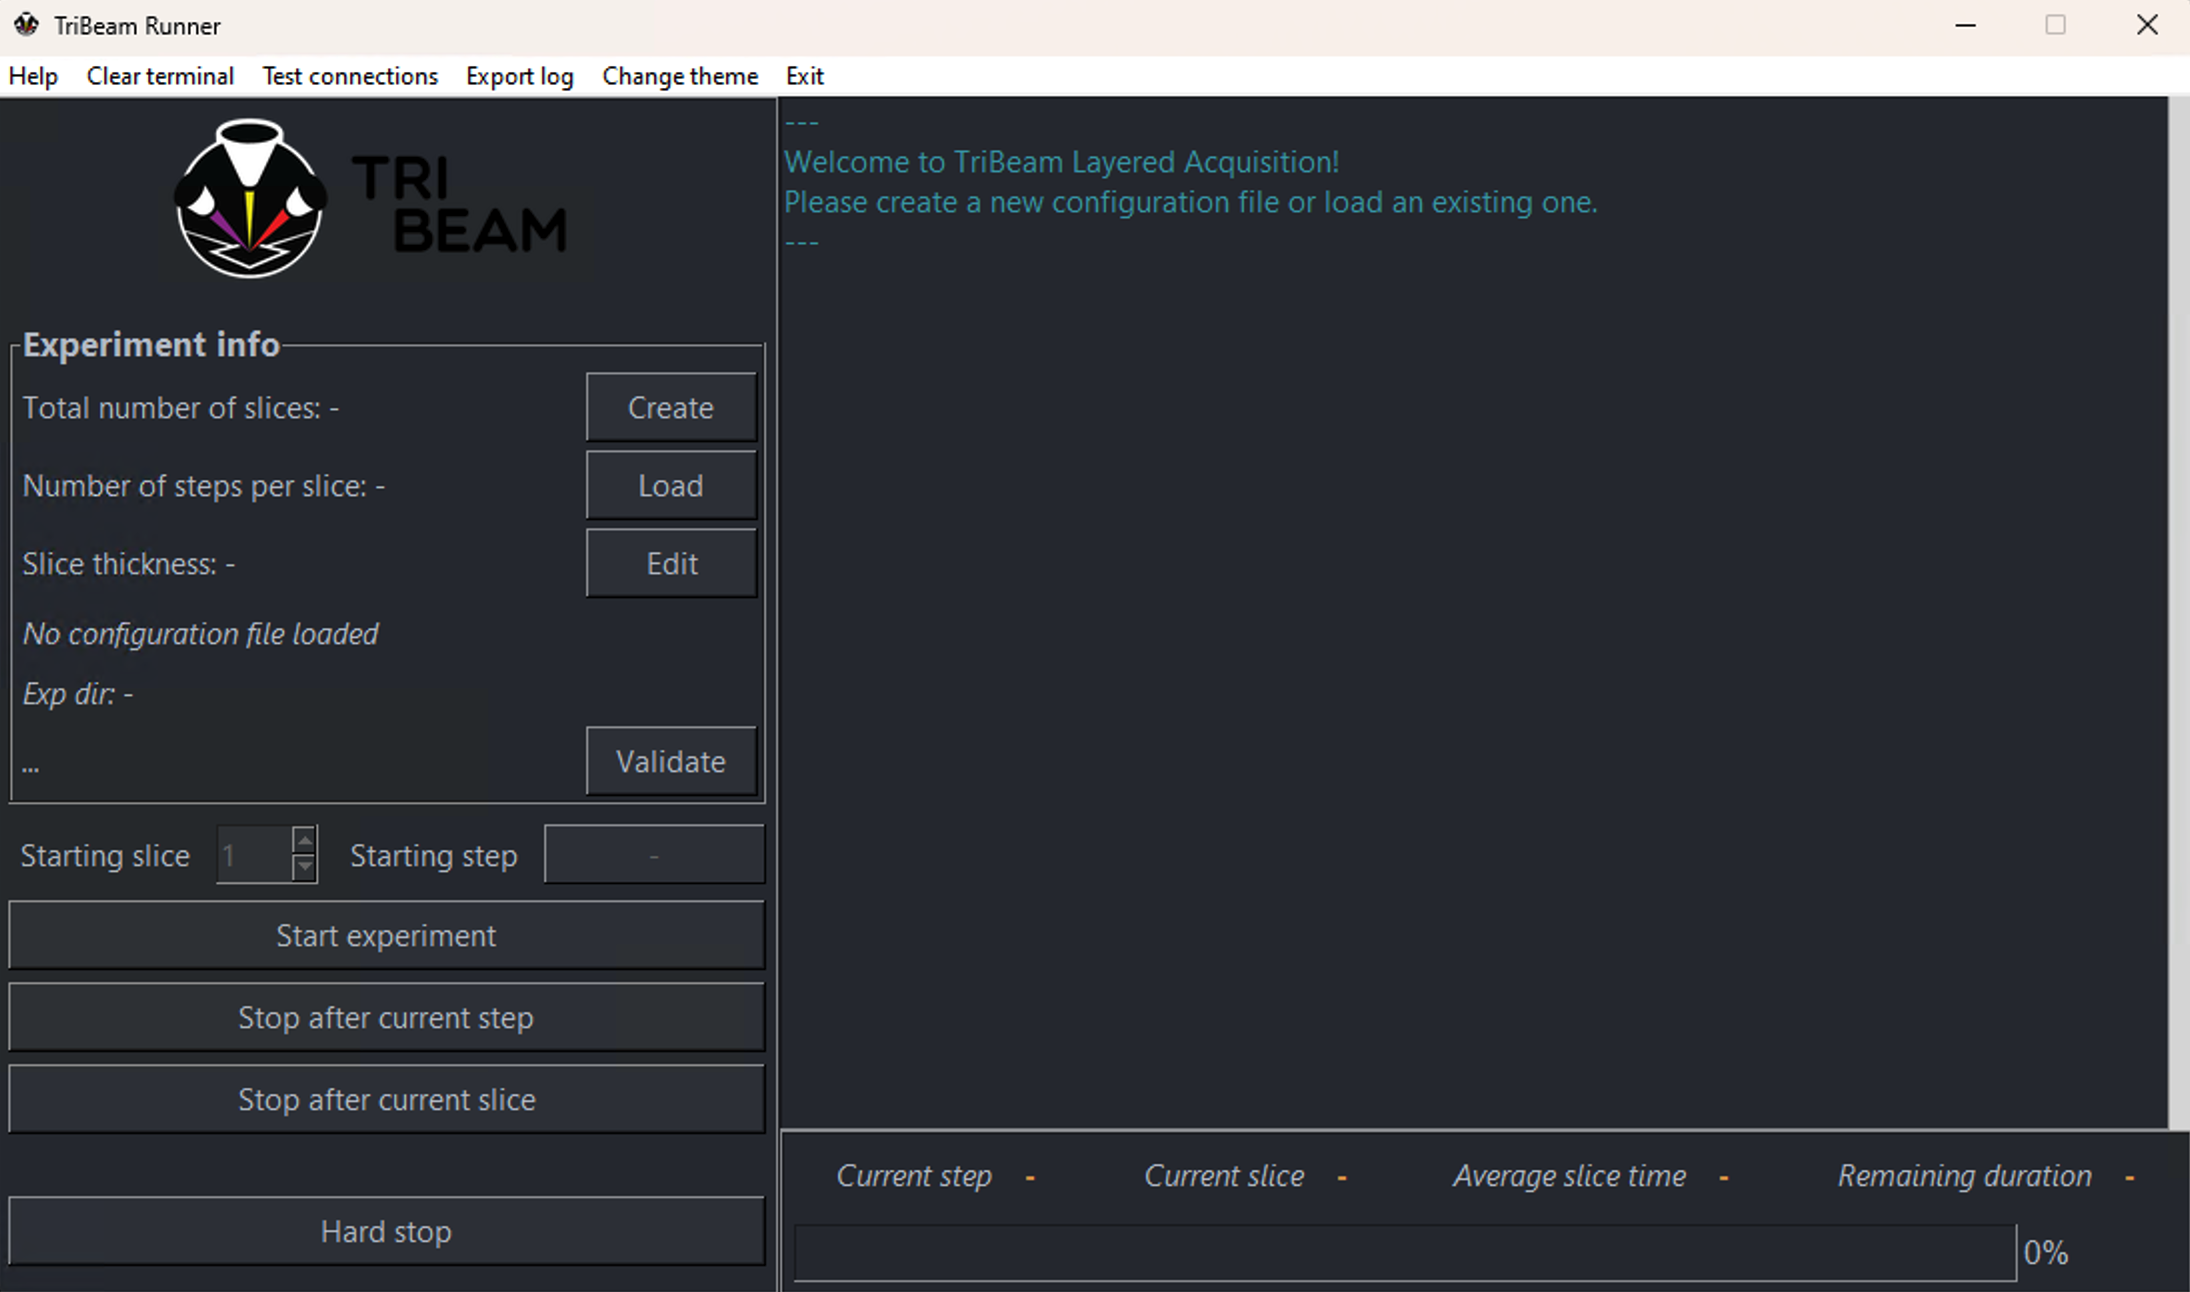
The langing page is broken up into several sections, namely:
Menu Bar
The top menu bar provides various functionalities, including:
- Help: This will attempt to open the user guide, either a local version of the userguide, or the online version stored here. If you want a local version, please download the built book (the entirety of the
bookfolder) from thegh-pagesbranch here and put it in the following location relative to where you installed the package:./docs/userguide/. - Clear terminal: Clear any messages below the welcome message in the central console window.
- Test connections: Checks whether
pytribeamcan successfully talk with the Laser and any 3rd party EBSD or EDS detectors. A window will pop-up displaying the results of the test. Thermo Fisher Scientific's Laser application must be open to connect, and EBSD and EDS connectivity additionally requires a connection to the Laser. - Export Log: Opens
Save As...file dialog to export the contents of the terminal to a text file. - Change Theme: Switch between Dark and Light themes for the GUI.
- Exit: Exits the program. This should not be performed while an acquisition is running, instead the experiment should be stopped as described below.
Experiment Configuration
The upper-left side of the GUI contains tools for creating, editing, and validating configuration files. A new configuration file can be created by clicking the Create button, which opens up a new window with the TriBeam Configurator, details on which can be found here.
Exisiting configuration files can be loaded by clicking the Load button, which will open up a file browser. Once a configuration file is created or loaded, the configurator can be reopened by clicking the Edit button or validated by clicking the Validate button. Validation includes a full-suite of checks on configuration files intended to catch any invalid or improper settings that can stop an acquisition from running. This validation is always performed at the start/continuation of an experiment, but its use in the GUI can help to identify any errors prior to the start of an acquisition.
Acquisition Management
The bottom-left side of the GUI contains various buttons for starting and stopping an acquisition, and also provides the user with direct control over what slice and step to begin acquiring a dataset. This includes the following buttons:
- Start experiment: Begin acquisition at the currently displayed starting slice and step.
- Stop after current step: Cleanly exit data acquistion at the end of the step currently being exectued.
- Stop after current slice: Cleanly exit data acquisiton at the end of the slice currently being collected (will complete all remaining steps on that slice in order).
- Hard stop: Stops the experiment as quickly as possible by severing the microscope connection. Also throws the
Esccommand to the xTUI to stop any in-process stage movements. Control over insertable devices already in motion is not guaranteed after this has been pressed, but no additional commands will be sent to the microscope bypytribeamafter this button has been pressed.
Acquisition Monitoring
The right-side of the GUI contains a large terminal window to capture output from the data acquisition that updates the user on current activities such as stage destination positions, whether detectors are being inserted or retracted, beam voltage adjustments, and more. Any warning or error messages generated during an acquisition will also be output to this terminal. The terminal currently has no limit on output length (10 million ASCII characters, over 100,000 lines, should take less than 10 MB of RAM), but this may change in the future. It is advisable to clear the terminal using the Menu bar when restarting/resuming an experiment to avoid any potential performance issues. Below the terminal window is high-level data related to total experiment progress, the current slice and step, as well as an average slice time.