Tapping a Link Within an Experiment
In this tutorial we will demonstrate how to effectively use the layer2.tap Model Component to mirror traffic from one VM to another VM within an experiment. This could be useful in experiments where in-experiment traffic needs to be processed by some collector/analysis platform, such as Zeek, Splunk, or Elastic Stack. For our purposes, we will build off of the topology built in the Simple Server Tutorials (the completed topology can be cloned from FIREWHEEL’s git repository).
If you haven’t already cloned the tutorials.simple_server Model Component into FIREWHEEL, do the following:
$ cd /opt/firewheel/model_components
$ git clone ssh://<git server hostname>:firewheel/model_components/tutorials/simple-server.git
Updating Simple Server
The simple server tutorial will be updated here to use the layer2.tap MC after the topology has been created.
This Model Component walks the graph looking for Edges that have the tap attribute set.
Specifically, the tap attribute on the Edge must specify a list of collectors that will receive the mirrored traffic.
The list of of collectors can contain either the actual Vertex object (recommended) or the name of the collector Vertex.
Generally, this “collector” of the mirrored traffic will be some sort of analysis platform such as Zeek or Splunk, but for our purposes here we’ll just use a Ubuntu1604Server.
Tap a Link in the Topology
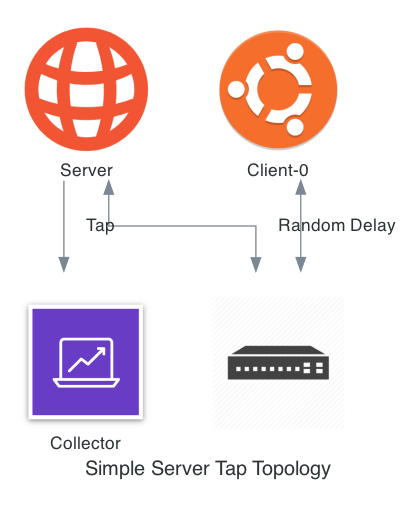
First, we need to choose a link to tap in the topology. Let’s assume that the traffic to the Server needs to be monitored. Then the topology would look like:

Open the tutorials.simple_server plugin.py file to start editing the topology.
In our case, we will first want to build a new “collector”.
First import the linux.ubuntu1604.Ubuntu1604Server class at the top of plugin.py:
from linux.ubuntu1604 import Ubuntu1604Server
Then, at the end of the run() method, add the following:
collector = Vertex(self.g, name="Collector")
collector.decorate(Ubuntu1604Server)
Now that we have created a collector, we can add the tap attribute to the Edge between the Server and the Switch.
In this example, we will add this attribute as soon as we build the connecting edge via the Edge object’s connect method.
To add the tap to the edge, modify the statement:
server.connect(
    switch,  # The Switch Vertex
    server_ip,  # The IP address for the server
    "255.255.255.0",  # The subnet mask for the IP address network
)
to look like:
interface_name, edge = server.connect(
    switch,  # The Switch Vertex
    server_ip,  # The IP address for the server
    "255.255.255.0",  # The subnet mask for the IP address network
)
The connect method will return a tuple with the interface name and the edge object (e.g. ("eth0", <firewheel.control.experiment_graph.Edge>)), and so we will grab the edge object and then set its tap attribute to point to the collector (i.e., the VM which will receive the mirrored traffic).
# Build a collector vertex
collector = Vertex(self.g, name="Collector")
collector.decorate(Ubuntu1604Server)
# Add the collector to the edge as a tap
edge.tap = [collector]
Note
You can also use the find_vertex and find_edge methods in the experiment graph to help locate this Edge. For example:
server = self.g.find_vertex("Server")
switch = self.g.find_vertex("Switch")
edge = self.g.find_edge(server, switch)
Launching the New Experiment
Because we want our layer2.tap to run after our topology, we have a couple of options for launching our new experiment. The easiest approach is to simply add the layer2.tap to the command line arguments when launching the experiment. With this approach, your new command will look like:
$ firewheel experiment -f tutorials.simple_server:10 layer2.tap minimega.launch
Alternatively, there is a way of specifying a post-MC-execution dependency within the MANIFEST called precedes.
That is, a precedes relationship indicates that a second MC must be installed and executed AFTER another MC.
See Dependency Management for more information on this relationship.
To use the precedes relationship, we can open up the tutorials.simple_server MANIFEST file and add the attribute tap to the attributes precedes block.
attributes:
depends:
- graph
precedes:
- tap
provides:
- topology
model_component_objects: model_component_objects.py
model_components:
depends:
- linux.ubuntu1604
- base_objects
precedes: []
name: tutorials.simple_server
plugin: plugin.py
vm_resources:
- vm_resources/*
Then when you re-launch the experiment, the layer2.tap MC will automatically run after tutorials.simple_server.
Regardless of the method used to add the layer2.tap to the experiment, the resulting output from the experiment should look similar to:
Dependency Graph                                                     0005.308 s
********************************************************************************
misc.blank_graph                                           OK     in 0000.002 s
base_objects                                               OK     in 0000.017 s
generic_vm_objects                                         OK     in 0000.000 s
linux.base_objects                                         OK     in 0000.027 s
linux.ubuntu                                               OK     in 0000.021 s
linux.ubuntu1604                                           OK     in 0000.012 s
layer2.ovs                                                 OK     in 0000.014 s
tutorials.simple_server                                    OK     in 0004.563 s
layer2.tap                                                 OK     in 0000.005 s
minimega.emulated_entities                                 OK     in 0000.002 s
minimega.testbed_available                                 OK     in 0000.030 s
vyos                                                       OK     in 0000.033 s
vyos.helium118                                             OK     in 0000.014 s
minimega.create_mac_addresses                              OK     in 0000.003 s
minimega.resolve_vm_images                                 OK     in 0000.014 s
minimega.configure_ips                                     OK     in 0000.003 s
minimega.send_miniweb_arp                                  OK     in 0000.001 s
minimega.schedules_ready                                   OK     in 0000.000 s
vm_resource.schedule                                       OK     in 0000.055 s
vm_resource.validate                                       OK     in 0000.014 s
minimega.parse_experiment_graph                            OK     in 0004.013 s
minimega.launch                                            OK     in 0000.001 s
********************************************************************************
Total time                                                           0026.712 s
Viewing Mirrored Traffic
Once the experiment is running and configured, there should be an interface on the collector that follows the naming convention of tap<Integer>.
By default, the tap model component will start the integer portion of interface naming with the value 1000.
This value actually represents a GRE tunnel key value.
(See the layer2.tap documentation for more information on the GRE tunnels and how the traffic is actually being mirrored.)
At this point, we need to generate some traffic so that it can be mirrored.
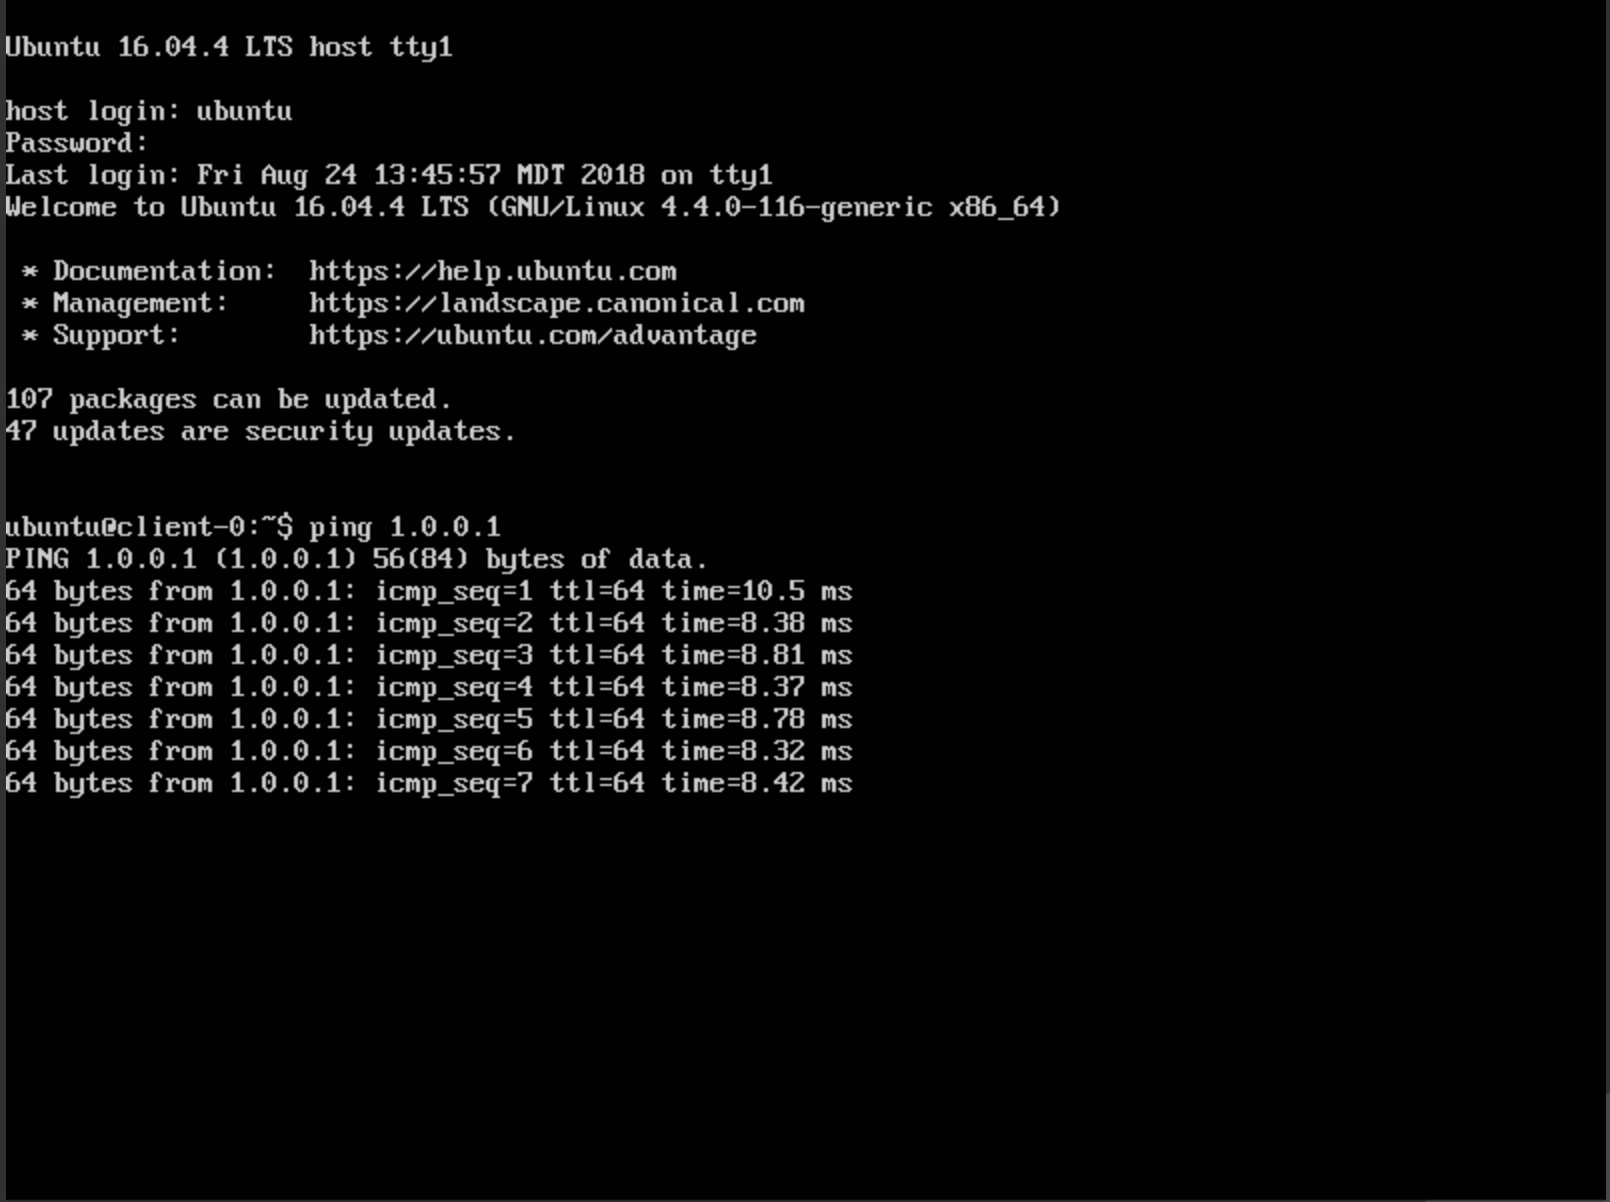
Let’s ping from client-0 to Server (IP address 1.0.0.1).
We have connected to miniweb, and we have also connected to client-0:

Once you login, ping the Server at 1.0.0.1.

Leave the ping running and connect to the collector.
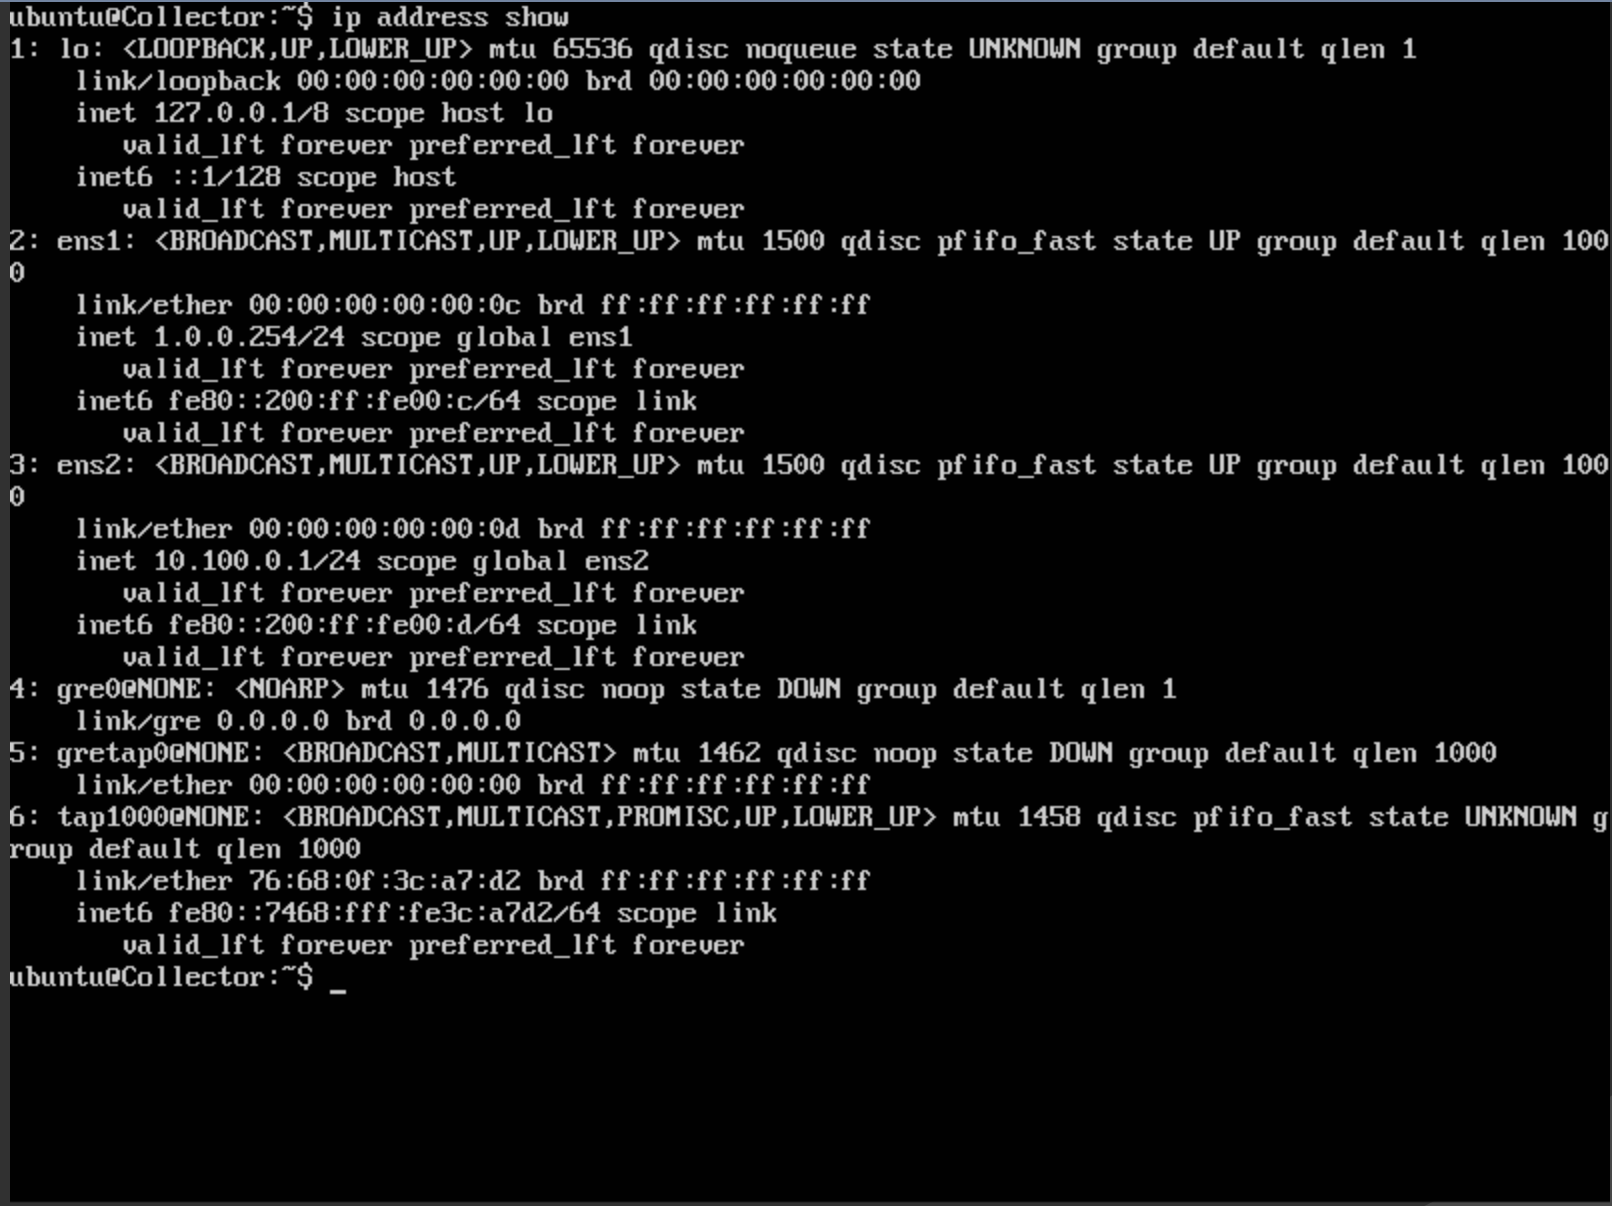
We can now look for the tap<X> interface:
$ ip address show

You should see an interface named tap1000@NONE.
This is the interface that is receiving all the mirrored traffic from the tap.
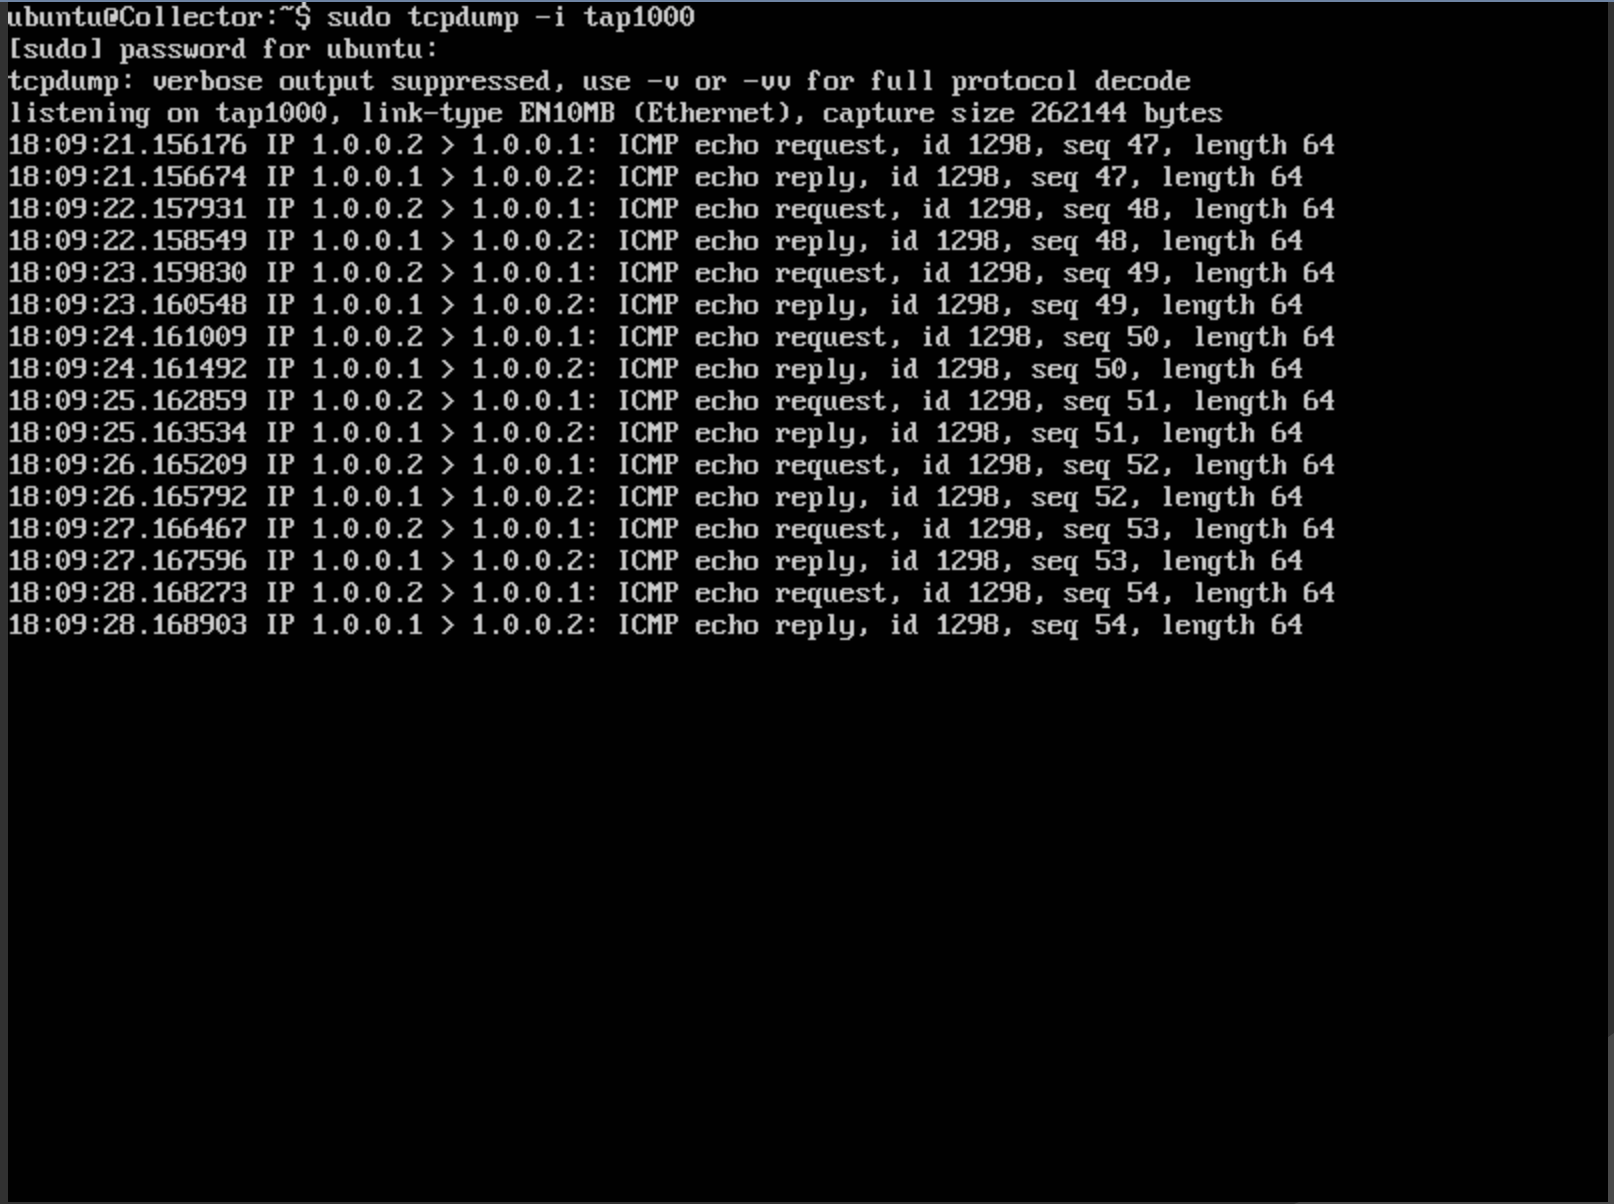
The traffic can be viewed with the tcpdump command:
$ sudo tcpdump -i tap1000
The ping traffic that was initiated from client-0 should be visible.

Analysis Platforms
Most use cases will probably incorporate some kind of analysis platform like Zeek or Splunk.
Many of these analysis platforms have a way of specifying to which network interfaces they should attach.
As mentioned above, all mirrored traffic shows up at a collector on interfaces that follow the tap<X> naming convention.
Therefore, direct the analysis platform at all interfaces named tap* in order to ingest the mirrored traffic.
Updated plugin.py
import random

from base_objects import Switch
from tutorials.simple_server import SimpleClient, SimpleServer
from linux.ubuntu1604 import Ubuntu1604Server

from firewheel.control.experiment_graph import Vertex, AbstractPlugin


class Plugin(AbstractPlugin):
    """tutorials.simple_server plugin documentation.

    This Plugin creates a basic topology with a Server and several clients.
    The clients all have a random delay on their outbound connection.
    """

    def run(self, num_clients="1"):
        """Run method documentation.

        This method contains the primary logic for the Plugin.

        Arguments:
            num_clients (str): The number of clients in the topology. This should be
                convertible to an integer.
        """
        try:
            # Convert the number of clients to an integer
            num_clients = int(num_clients)
        except (TypeError, ValueError):
            print("The number of clients has to be a valid integer.")
            raise

        # Create the Server
        server = Vertex(self.g, name="Server")
        server.decorate(SimpleServer)

        # Create the switch
        switch = Vertex(self.g, name="Switch")
        switch.decorate(Switch)

        # Connect the server and the switch
        server_ip = "1.0.0.1"
        edge_tup = server.connect(
            switch,  # The Switch Vertex
            server_ip,  # The IP address for the server
            "255.255.255.0",  # The subnet mask for the IP address network
        )

        # Create all of our clients
        for i in range(num_clients):
            client = self.create_client(f"client-{i}", server_ip)

            delay = random.randint(1, 100)
            # Connect the client and the switch
            client.connect(
                switch,  # The Switch Vertex
                f"1.0.0.{i+2}",  # The IP address for the client
                "255.255.255.0",  # The subnet mask for the IP address network
                delay=f"{delay}ms",
            )
        collector = Vertex(self.g, name="Collector")
        collector.decorate(Ubuntu1604Server)
        edge = edge_tup[1]
        edge.tap = collector

    def create_client(self, name, server_ip):
        """Create a single client.

        Arguments:
            name (str): The name of the vertex.
            server_ip (str): The IP Address of the Server.

        Returns:
            tutorials.simple_server.SimpleClient: The newly created client.
        """
        client = Vertex(self.g, name=name)
        client.decorate(SimpleClient)
        client.grab_file(server_ip)
        return client