Meshing Overview#
Blades can be meshed either with the in-house mesher or with Cubit.
The intent of the in-house mesher is to be independent of any target FEA code (Nastran, Abaqus, ANSYS, etc..). It provides nodes and element connectivity that can be ported into any FEA code. It first meshes the outer-mold-line with shell elements. if a solid model is desired, then solid elements are created by extruding from the shell mesh. Currently, the code provides separate meshes for the webs, aeroshell, and adhesives that mush be tied together with constraints in an FEA package.
The intent of the Cubit mesher is to be able to create solid and beam models that have the exact same cross-sections. Therefore, the Cubit mesher first creates cross sections, rather than the OML surface shell mesh. If a solid model is desired, then the cross sections are connected with volumes and subsequently meshed. Since cross sectional codes like VABS and ANBA do not allow for discontinuous meshes connected by tie constrains, the meshes made by the Cubit mesher are continuous. The other intent with the Cubit functionality is that Sierra meshes are easily created since it can directly export into the Genesis format.
The table below summarizes the differences between the two meshing capabilities.
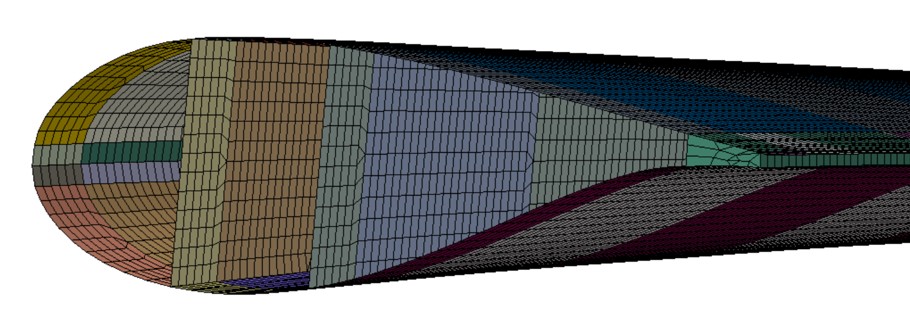
Fig. 3 Sample shell mesh generated by in-house mesher#
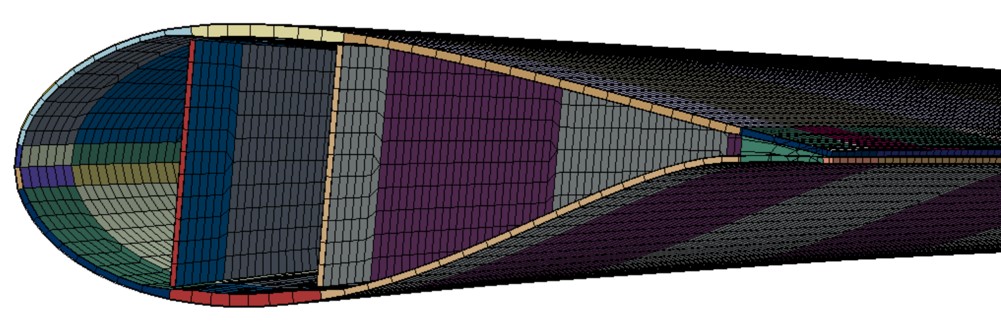
Fig. 4 Sample solid mesh generated by in-house mesher#

Fig. 5 Sample cross section generated by driving Cubit with pyNuMAD#
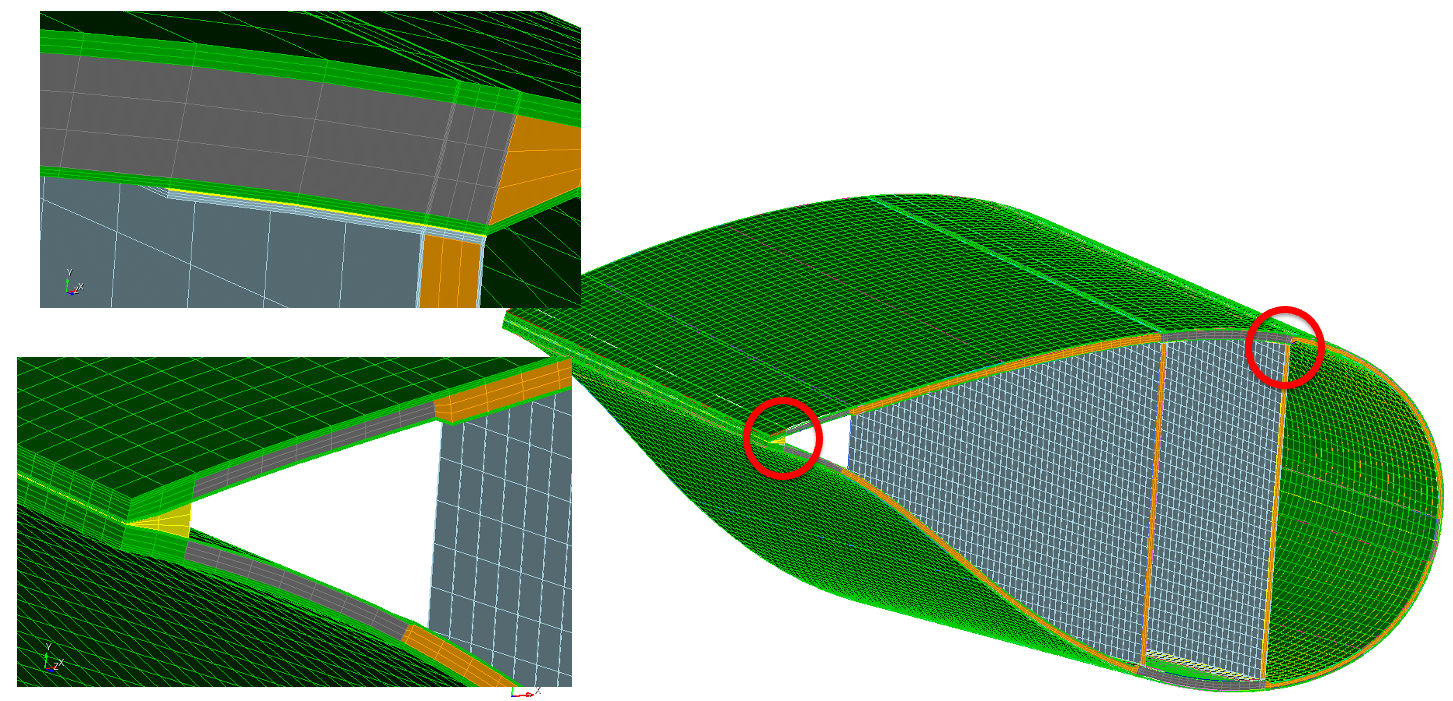
Fig. 6 Sample solid mesh generated by driving Cubit with pyNuMAD#
In-house mesher#
Constructing a blade mesh using the in-house capability can be done with a single command, once a blade object has been created. To generate a shell mesh, use pynumad.mesh_gen.mesh_gen.get_shell_mesh(), as demonstrated below:
from pynumad.mesh_gen.mesh_gen import get_shell_mesh

adhes = 1     ## Specify whether to include solid-element trailing edge adhesive (1 for yes, 0 for no)
elSize = 0.1  ## Approximate element size in meters
shellMesh = get_shell_mesh(blade, adhes, elSize)
## blade is the blade object, to be pre-generated either with Blade.read_yaml() or otherwise loaded
For a solid mesh, use pynumad.mesh_gen.mesh_gen.get_solid_mesh():
from pynumad.mesh_gen.mesh_gen import get_solid_mesh

elSize = 0.1         ## Approximate element size in meters
layNumEls = [1,3,1]  ## Number of elements through the thickness of each major blade layer, (outer skin, filler, inner skin)
solidMesh = get_solid_mesh(blade,layNumEls,elSize)
The output, denoted shellMesh or solidMesh in this example is a python dictionary object, containing the following data fields:
nodes: a numpy array containing the x-y-z coordinates of the nodes in the blade and shear webs.
elements: a numpy array containing the nodal connectivity of blade and shear web elements.
sets: a collection of node and element sets, each with a name and label list in the form of a python dictionary.
sections: a list of sections, each specifying an element set and material, layup and orientation information for a given blade section.
adhesiveNds: a numpy array containing the x-y-z coordinates of the nodes in the trailing edge adhesive.
adhesiveEls: a numpy array containing the nodal connectivity of trailing adhesive elements.
elementOrientations: a numpy array containing the direction cosine orientation matrix for each individual element.
constraints: a list of nodal constraint equations, which tie the movement of adhesive and/or shear webs to the outer shell of the blade. Each constraint is a series of terms, giving a node and coefficient such that the corresponding sum of displacement degrees of freedom is zero.
This output information can be accessed and used in the environment of the user’s choice, or alternatively written in yaml format using pynumad.io.mesh_to_yaml.mesh_to_yaml():
from pynumad.io.mesh_to_yaml import mesh_to_yaml

mesh_to_yaml(meshData, "bladeMesh.yaml") ## meshData is the output from one of the meshing functions above
Meshing with Cubit#
After setting the path to Cubit, import pynumad
import pynumad
Then add Cubit to the path
import sys
sys.path.append(pynumad.SOFTWARE_PATHS['cubit'])
sys.path.append(pynumad.SOFTWARE_PATHS['cubit_enhancements'])
import cubit
There are two main ways to use the Cubit functionality. The first is the create any all blade cross sections with
cubit_make_cross_sections(). The second is to connect these cross sections with
solid volumes with cubit_make_solid_blade(). Both ways require the user
to define two dictionaries.
One is named cs_params. It controls the details of how the cross-sections are created. The table below shows
all of the required keys as well as their descriptions.
The figures below also helps to define some of the cs_params.

Fig. 7 Trailing edge detail.#
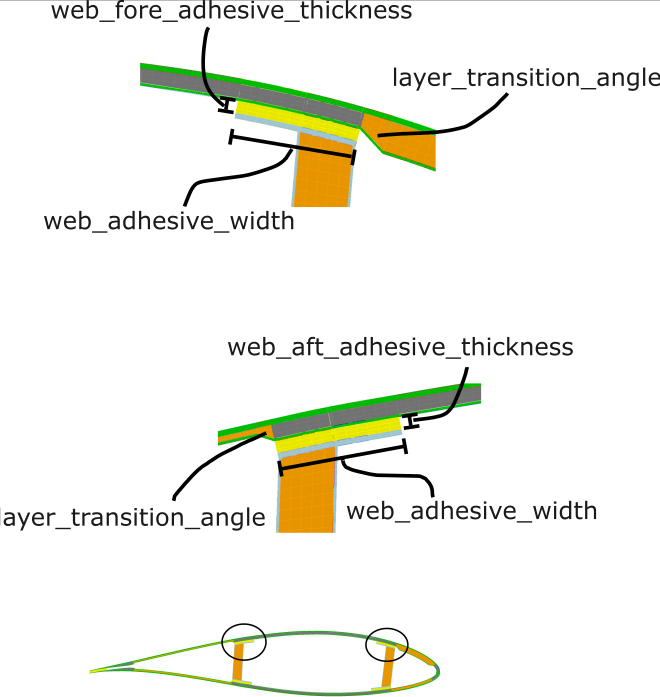
Fig. 8 Web adhesive detail.#
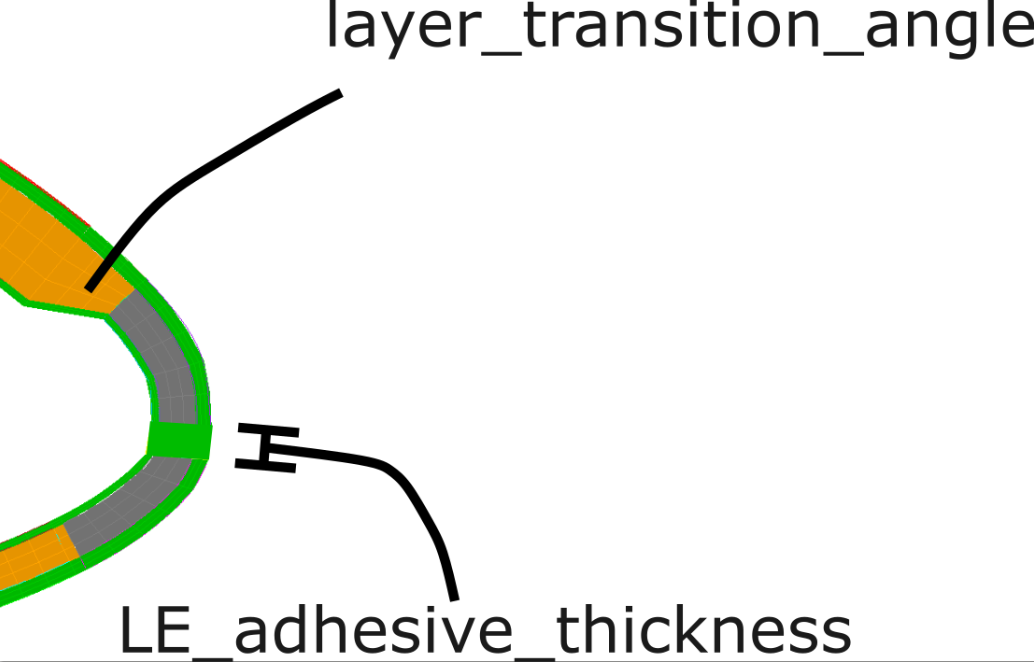
Fig. 9 Leading edge detail.#
The other dictionary is named settings and it controls which codes you want to make input files for.
Key |
Description |
|---|---|
|
Type: str. “SM”, “SD”, “VABS”, “ANBA”, or None. It should all be in one string such as “vabssm”. Letter case agnostic. |
|
Type: str. “cub”, “g”, or None. It should all be in one string such as “cubg”. |
Note that “cub” files are only needed if you want to visualize your model in Cubit. “g” refers to Genesis binary files that are needed by the Sierra codes.
Troubleshooting issues with Cubit meshing is facilitated by “{wt_name}.log”. There you will generally be able to see what parts of the blade have been created and where the code stopped.
Log File A log file is generated that communicates progress. Warning messages are also stored here. Check this file for troubleshooting.
Limitations The adhesive width must not exceed the width of the reinforcement. If it does it will be reduced. A warning will be written to the log file.